Every time I went to visit Mrs. Rose in her room, she was sitting in her chair.
Now I'm almost positive that back in 1977, her chair was most likely a standard issue, vinyl chair with wipeable seat. That's because in 1977, residents were not yet allowed to bring their own furniture from home. In fact, there was very little in Mrs. Rose's room that was home-like.
But my memory of Mrs. Rose does not allow me to see that institutional chair.
That being said, if my memory has to place her in a chair, I would put her in a wingback arm chair, a homey version that you might see in any older woman's cozy home.
Exercising artistic license, I gave Mrs. Rose the chair she should have had all those years ago.
I've mentioned that I cannot draw so I did what I normally do and went off to google images of chairs.
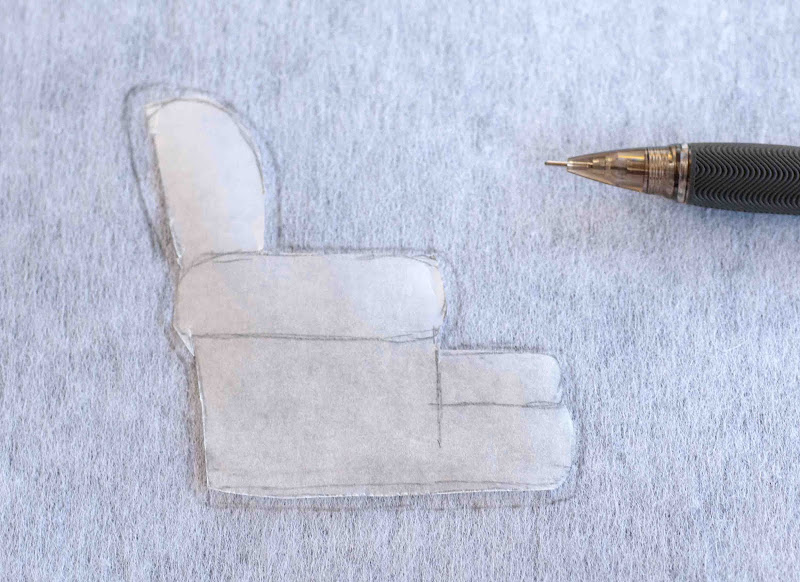
I then traced and modified the wing back to make the seat larger, the arm of the chair thicker and the wings smaller to better serve my purpose.
I used an upholstery fabric sample and some foam I got at the crafts store.
I fused the back of the chenille fabric with interfacing to prevent the edges from fraying when I cut out the chair. I traced the pattern slightly larger to accommodate the width of the foam...
Following the crease lines of the chair, I tacked the foam onto the block and appliqued the chair fabric over top.
Once I finished attaching the chenille to the block, I have to admit it didn't look like much...
So I began to sculpt by stitching through both the fabric and the foam, giving definition to the chair...

And now I feel it a worthy place for Mrs. Rose to sit.









28 comments:
I really loved your process for making the chair. My mum had a chair just like that and I now have it. It's quite comfortable.
I love my comfy wingback armchair, and I'm happy to know Mrs. Rose will now have a comfortable spot to sit and rest.
How do you ever think of all these marvelous things?! I have foam & I have upholstery fabric, but I'd never in a zillion years think to put the two together to make such a fantastic stitched chair! You are over-the-top creative, and I mean that in a GOOD way! :)
Your pattern is similar to the one I just bought this year. I love it so much. I makes me glad to think that you chose this wonderful style for Mrs. Rose. I have a lot of thoughts about this piece you chose and I am anxious to watch it evolve.
xx, Carol
Don't you just love Google and doing paper cutouts...When I'm into that mode I feel about 10 years old and sitting on my bed making things for my paper dolls... Fantastic chair and the sculpting was the perfect touch... Hugs Ger
Oh Susan this is so wonderful that you have given Mrs. Rose a comfortable wing chair to sit in. Perception is better than reality so many times...at least in my world. Mrs. Rose will be eternally happy...
You are SO clever! Thanks for explaining the process. I think Mrs. Rose is smiling down on you!
You're amazing. I love the fact that you give us your process and not just the finished piece. Thank you.
Love the step by step and narration as you go. Wonderful!
I think it's going to be a lovely place for Mrs. Rose to sit. Thanks for sharing your process and journey.
If I were Mrs. Rose, that would be my chair too.
Thank you.
such a comfortable chair for Mrs Rose and good to see how you went about producing it, very clever
I agree - I think Mrs Rose would have been delighted. Funny, about that same time, during the 70's, there was a Miss Rose, an elderly lady who lived over the road from me.=)
I do much the same with things I want to look just right - source images and then trace and adapt them. It's been said that anyone who can hold a pencil can draw and I think that's true, but when our main hobby is something else and we only have limited time, it's hard to take the time to develop and practice the skills.=)
Lovely Susan! and thanks for sharing
This is shaping up to become another wonderful piece!
This is a very original design subject. Thanks for sharing the details of the chair contruction.
lovely piece of work Susan....
I've been following your series on Mrs. Rose since you started, I am touched by your thoughtfulness as you describe Mrs. Rose and her life in the Nursing Home. I worked in a Nursing Home for a few years in the late 70's and early 80's and can relate to your stories here. Your stitching is amazing, and if it's true that a picture speaks a thousand words, this speaks volumes. I'm in awe!
Amazing!
The sculpting really finishes the chair.
Brilliant is the word that comes to mind when thinking of you and your work! Thank you for sharing.
I have a chair very like this one - and you've brought it to life wonderfully well. It looks well-upholstered and comfortable.
Smashing to see the process along with the memory!
The chair is perfect! And I love hearing the story of Miss Rose as you stitch! I never thought of tracing pictures, thank you for sharing your process with us! Wendy
Susan!
I can't draw either. After a lot of frustration I've learned that I see shapes, not lines. Now I work with a vector drawing program (Corel) that lets me push shapes around until they look like what I want.
Love the chair, love the way the shading of the background leads us right to the focal point. Awe-some!
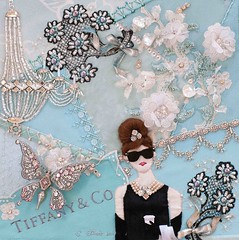
As I try and catch up on my blogg reading yours was one of the first I choose to get back into. I am so happy to see your Tiffany piece in a magazine. That is just fabulous. I am looking forward to seeing the proces on your new piece. Glad I went back into your blog to find out it's background.
Teresa's Heartfelt Stitches
Wow, that's some beautiful finishing! That fusing really stops frayed ends, by the look of it (Megan emerges slightly more into the modern world, after swearing the only modern substances she'd ever use were glue and fraystop - I do draw a line at using rabbit hide glue in the TT casket course tho - I don't want to be responsible for any cold rabbits.)
Such an artist you are.
Post a Comment