Showing posts with label Summer charm school. Show all posts

Tuesday, September 1, 2009

The End of Charm School

I just couldn't resist. I had to see them all together in one picture. And I've pasted their names and links in case you missed a post.


1. Poise
2. Finesse
3. Charity
4. Serenity
5. Perseverance
6. Devotion
7. Enthusiasm
8. Modesty

extra credit (I don't know why I didn't name this one??)

Here's what I learned from Summer Charm School:

  • I LOVE seeing them all together at the end and remembering what I learned -- which was a lot. I feel like I accomplished my original goal of getting to know some of those dusty books on my shelves and actually getting some stitching done while Jack was home this Summer. Once a week was a good idea and was manageable.
  • I learned that finishing the bits of needlework into little charms took the most time. Next time, I might come up with a simpler charm idea -- All charms would be the same size cloth rectangles, for example, this might simplify things a bit...or, I might do a summer sampler and forget the whole charm idea...
  • I fell in love with stumpwork all over again. I really enjoy this technique because it combines so many types of needlework.
  • I did not enjoy whitework one bit. I enjoy pulled work better I think. Plus, I didn't have the right supplies for whitework...
  • It was a lot of work to gather the supplies for one technique and then use completely different supplies the next week -- this made for extra prep and clean up time. Next time, I might explore multiple books within one technique and spend the entire Summer on goldwork or stumpwork, for example...
  • The deadline every week worked for me. I was successful in spending lots of time with Jack but at the same time, the structure of having to post something every Tuesday was very helpful.
Which are my most/least favorite charms?? Least favorite, by far, is Charity. I'm sorry, Charity, but I just see my mistakes when I look at this little charm. And, I didn't like how I finished that charm. In hindsight, I wish I had made it into a small puffed heart shape...

My most favorites are much harder because I like many of them -- but that's a cop out -- so, my most favorites are Devotion, Serenity and Modesty, in that order.

Devotion because I loved working with the tiny beads and exploring the Berlinwork patterns...and the finished charm just really works for me.

I love Serenity because it's inside the seashell and I think that turned out beautifully. I could see shells used in lots of creative ways with needlework to make charms...hmmm...

And, the only reason that Modesty is my third favorite is because I don't like the flower floating on the piece of lace but I LOVE the flower itself.

So, there you have it. My top three faves and my least fave...I put a poll on the sidebar so we could see which one you liked best. I am curious what you all think...and I fixed the poll so you could vote for more than one!

Now, what to do with them??

I think I'm heading to Finishing School to learn how to make them into necklaces. In my head, I imagine putting them together in groups of three and making three different multi-media necklaces from them...

But, I have no idea how to make jewelry and necklaces...so, I guess there's no choice but more schooling...Finishing School that is. I just have to find some books, websites and magazines that can teach me the basics.

Thanks to all of you for following Summer Charm School and for all of your comments along the way. Your attendance and encouragement made my Summer of stitching lots more exciting...

Tuesday, August 25, 2009

Charm School Week Eight: Stumpwork

Modesty

In the language of flowers, the cosmos stands for modesty. And so, Modesty becomes the charm for week eight of Charm School.

This week, I chose to stitch the cosmos from Di van Niekerk's Ribbon Embroidery and Stumpwork book because it's the one that appears on the cover. And I just fell in love with it.


The book presents a sampler with 17 different panels (this is panel #11). The book is arranged by panel, giving supply lists and instructions for each individual section. The overall sampler is stunning and would be a worthy undertaking if you are that ambitious.

The book recommends using Di's very own ribbon...which I do not own so I substituted Hanah silk ribbon and it worked beautifully. I also was supposed to use a medium weight interfacing -- I only had a heavier weight so I used that. I do think the flower would have looked a lot more fluid and light if I had used a lighter interfacing.

I loved this technique but it was extremely time consuming. Not a method that you should choose if you are in a hurry -- but I feel like the results are stunning and I will definitely use it again.


First thing I did was trace the shapes of the petals onto the interfacing using a mechanical pencil. The author recommends using a soft lead but I find I prefer the thinner line of the mechanical pencil. It was great that she provided all of the petal shapes and they were each numbered.


Next, I cut out the petals and ironed them onto the ribbon. I didn't have that beautiful pink color ribbon used in the model so I used this red instead. Next time I think I would select a ribbon that had a little more variegated color... I was very careful to keep the petals in numerical order because those teeny tiny numbers were very difficult to read on the dark ribbon...


Next, I cut out the petals using my embroidery scissors -- those babies are tiny!

Once the petals were cut, you use a slight bit of glue and paste them onto water soluble stabilizer that was stretched in a hoop. Oh, how I wish I had known about this technique when I was making my thistle a few weeks ago...


Again, I was very careful to keep the petals in order because, if you didn't, I think it would be a nightmare to figure out. Once the petals are all stuck to the stabilizer, you were supposed to use a lightbox or a window and trace the vein lines from the interfacing on to the front of the petal.

I skipped that part and eyeballed the lines...which went a lot quicker.

I then stitched all the vein lines on the petals with Caron Waterlilies thread and stitched the gold centers for the flowers onto white felt.


When that was finished, you cut out the shapes and dissolve the stabilizer in water. Very easy and the stabilizer dissolves within seconds.

Again, I kept the petals in order and proceeded to wet them one at a time -- once the petals were wet, I really couldn't read the numbers!


This trick was great! The glue stabilized the embroidery threads, helped keep the interfacing from peeling back from the ribbon, helped to keep the ribbon from fraying....it was the one step that really was an innovation for me. Brilliant!

After all the petals were dry, I finally got to sew them together into a flower. And, after six hours or so, that was a really nice tasting dessert!


I didn't have time to make the entire panel of cosmos flowers so I chose to put the flower together on green felt. I was really stumped how to turn this one flower into a charm this week -- plus, I was tired -- so I used this lace motif -- which, I'm not sure I'm happy with...


But can't you imagine how lovely this would look with a whole bouquet of flowers made this way? It would be breathtaking. This poor guy needs more buddies and a stem and some more leaves but time was short after six hours of work!

I have enough petals to work the other two flowers when I get the chance. The rest of the book is chock-full of wonderful ideas and contemporary approaches to three-dimensional flower work. It's really a treasure trove.

As for Charm School, I think this is the last week for me. Eight weeks of school has been enough and Summer is winding down. Time to transition and begin the embrace with the Fall season and all that entails.


Next Tuesday, I'll do a final wrap up and graduation for Summer Charm School. I have enjoyed studying in detail those books that have been gathering dust on my shelves and I'd like to continue that discipline.

I just haven't figured out how...

Sunday, August 23, 2009

Sunday Musings...


Hi! I'm waving at you from my sewing room...my play palace...the place where all the needle action goes down...only problem is...

It's a mess.

So, I'm up here trying to clean it all up so I can start Fall with a clean work table. Hope springs eternal!

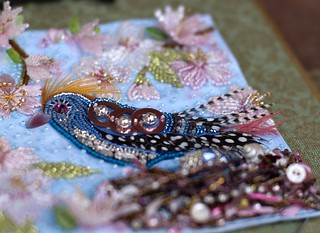
It takes me twice as long to clean up because I get distracted. I'd rather do anything but clean and sort and file. So...rather than clean up...I made this little vignette for Summer Charm School...


And I'm thinking about how wonderful it is to live in 2009 and to be able to use the internet and to have a blog. And even more amazing, is that there is a community of people who regularly stop by to read what I have to say! And, that you meaningfully comment and enrich my life because you "just show up". And I learn so much just by reading what you write and seeing what you're doing. It's much more gratifying than a magazine, isn't it?

I guess I'm thinking about blogging today for lots of reasons. First, I just read Robin's post about "Why Blog?"...and, I just had a good blog friend decide to stop because it takes up too much time...and gosh darn it, I'll miss her. Isn't that the craziest thing? That we can form these lasting and meaningful friendships by just coming around to witness (as Robin put it) what each other is doing. I can't tell you how BIG that is...and, frankly, it amazes me. So, today I honor our right to blog and all of you who choose to stop by and be part of my life. You are wonderful to know.

I'm also thinking a lot about blogging because I'm reading Julie and Julia for bookclub tomorrow night. I'm almost finished reading Julia Child's book about her life in France and I'm finishing up Julie and Julia (we could read one or both, our choice) -- which is about a woman who decides to cook her way through Julia Child's cookbook and post about it every day on her blog...and people show up to read it (which amazes her too)...


I'm sure you all know about it because Meryl Streep plays Julia in the movie that is out right now but I haven't seen it yet. I'm very much enjoying the immersion into the culinary world from the outside -- just reading about it...I don't really want to have to tackle it myself...but...tomorrow is the day...

Tomorrow, I, Susan, of Plays with Needles, am going to re-enter the culinary world and prepare a recipe of french cuisine from Julia's own cookbook. This is where your prayers come in...

Every August my book club covers a book relating to food so that we can have a potluck party where we all bring a dish we make from the book... Last year, you might remember my deflated dacquoise...

Well, so I'm thinking about cooking and blogging and I'm praying that I'll be able to successfully clarify butter and find creme fraiche at the grocery store...but that's a problem for tomorrow.

And tomorrow is a big day for lots of reasons. The main one being that Jim and Jack are finally, after about 8 years of trying to get tickets, going to attend a Ravens game. We lucked into the tickets at the last minute and I'm so excited for them to go...Not one of us has ever been to a professional football game let alone a Ravens game...


And they're sitting in Section 111. That's my special number.

And tomorrow morning, I'm waking up bright and early to head down to the Chesapeake Bay. I'll be participating in an Environmental Study run by the University of Maryland which will measure levels of bacteria that will stick to my body/hair, etc. after swimming in the Bay...Sounds like an adventure to me; Jim thinks it's a bit gross; and, Jack doesn't know what to think other than his Mom is making him go. The PhD running the study is letting Jack help with various tasks since he's not old enough to participate in the study. I thought that was pretty nice of her and I hope it's a learning experience for Jack.

I'm hoping it's a learning experience for me too because I've always wondered just how much the pollution in the Bay affects me when I swim in it (see, this is why Jim thinks it's gross...). And, I just read that Ocean City Maryland has very high water quality along it's Atlantic ocean shore...largely because the Bay is the sewer drain for all the storm runoff. That means the Bay is taking the hit and that makes me sad because I love the Bay and I would like it to be healthy.

And so, that's a lot of thinking for a lazy Sunday when I'm supposed to be cleaning...

(Note: The beaded hand was not made by me, unfortunately. I bought it a few years ago at an art show in Baltimore and sadly, it is not signed, so I cannot credit the wonderful artist...It's a good reminder to remember to sign your work!)

Wednesday, August 19, 2009

Charm School Week Seven: Tassels

Enthusiasm!


Let's face it. Enthusiasm is a wonderful trait to encounter either in yourself or in someone else. And, to me, tassels are enthusiastic, happy little things with no purpose other than to delight and amuse. So what better way to spend my time than playing with a technique that was so much fun -- but, challenging!

The book this week was a real treat to study. Most of the tassels within the book are meant for decorating your home and they are all stunning. Though, like any thread work, I believe that they would take practice to make them look as perfect as in the book.

Tassels have three main sections: a suspension cord, a neck and a skirt. My favorite section of this book is where the author splits the pages into three so you can create any combination of cord, neck and skirt. It's marvelous.


Many of the tassels are quite large but use mini tassels within their skirts. I decided to attempt three of the methods the author gives for mini tassels -- the are more "charm size". I was also thinking that a string of mini tassels would look great in a CQ block, quilt or purse... I have to admit that my little tassels are not nearly as exciting as the large ones in the book but I believe they've served to whet my appetite for their larger cousins.


The first mini tassel I tried (the little tan one) involved the one method I'd used before...wrapping threads around a cardboard template, cutting the ends and then making a neck. Simple and the result reminded me to make more tassels for things...

The second method caused a bit more struggle for me and was intended to help you make many mini tassels at once. Wrapping the skirt threads on a wrapping board...


Making a suspension cord for each section, dampening the threads to keep them together and then cutting them into sections...


I screwed up this part by having too many skirt threads and cutting the sections too short. It made me a little sad about wasting so much thread...*frown


I did salvage one however and used it to make this little gem...


That left the most interesting technique for last ~ making a cord that had multiple mini tassels hanging from it...


This was my favorite by far. The end result looks like a garland and I could just see it tucked around a block or a frame, embedded with embroidery and beads. It would be...well...

delightful.

I was really glad to finally sit down and figure out these mini tassel techniques. Thank you for your patience if you were looking for me on Tuesday. I was a bit late this week. I'll see you next week on Tuesday for Week Eight where I'll be looking to this book for inspiration:

Tuesday, August 4, 2009

Charm School Week Six: Berlin Work

Devotion


I loved this week in Charm School! First of all, the book I was "studying" was an absolute joy. The book is about 200 pages. The first 100 pages deals with the history of many types of embroidery in the 19th century and gives many wonderful historical examples of Berlin Work. The second 100 pages deals exclusively with patterns -- copies of antique, hand-painted patterns with some of them converted into a counted stitch chart for ease of use.

As I mentioned the other day, the patterns are what captured my attention the most in this book. The charts were hand-painted over a printed black/white grid and there is a subtlety of shading and mixing of color that you don't normally see on a counted chart -- kind of reminds me of pointillism.

Here's an example to give you an idea:


First thing I did, was separate some beads from my vintage purse fragment. Thank you to all of you who suggested that I save a rose -- I intend to take your advice.


I tested the beads over various count sizes of linen and finally decided on working on 40 ct. linen over two. This was the right size and shape for the beads to fit perfectly.

There was no stitching with this "bead dust", as Allie called it, without a magnifier. Frankly, I couldn't see the holes for the beads OR the fabric without it!


The rest was just counted work following a piece of a pattern from the book. I then used a button form and covered that with the beading, just like I learned from my mentor, Robin Atkins.


I had only one glitch which was that I misjudged the finished size of the button and so I had too much fabric around the rose which wasn't beaded. I chose to add clear beads to fill in the space and I wish I hadn't. Now the rose looks a little like it's floating out in the open whereas I would have liked you to see a true, smaller piece of a larger pattern. If I were to do it over again, I would have a better sense for the dimension of the beading and would use the pattern all the way around the edge of the covered button.


Overall, I'm very pleased with this little Charm I named "Devotion". It didn't turn out looking much like the antique button that I so love but that's a project for another day. The reproduction of that button is going to take me a little more prep time because I have to find a fabric that is slightly ribbed. I believe that the beads were couched in rows along the ribbed lines in the fabric...I think...

Oh and I almost forgot to mention how much I loved working with those teeny, tiny beads! Thank you to all of you who emailed me helpful hints and information. It was a real learning experience. I was also contacted by a woman named Nicole Belolan who did her Masters thesis this past Spring on Berlin Work -- and wrote this article titled Redefining Berlin Work in America: 1840-1865.

Next week I will be taking a blogging break for vacation but since I skipped last week's Charm School due to technical difficulties, I'm planning on posting Charm School on Tuesday anyway.

Next week, I'll be working from this book:


See you next week for school!

Monday, July 20, 2009

Charm School Week Five: Stumpwork

Perseverance


It's Thistle Week here at Plays with Needles. It wasn't intentional, but I've stitched two versions of a thistle within one week...very odd. Wonder what that means??

I really enjoyed hearing your stories about thistles from yesterday. It seems, for their prickly exterior, there must be something awfully sweet about the thistle blossom itself because horses gobble them like candy; hummingbirds and butterflies flock to them; and, gold finches can be seen covering them this time of year.

Picture courtesy of A Wing and a Prayer

But I digress. This week I explored Jane Nicholas' Dragonflies book.

All of Jane's stumpwork books are fabulous but I chose this one because it houses the design and instructions for this week's charm.

This week's charm is not my own design. Because of all of the supplies needed for stumpwork, I decided to work on a unfinished piece of Jane Nicholas' design. I had previously finished the dragonfly so I just needed to stitch the thistle (which Jane refers to as a cornflower but, for me, it's a thistle...) and convert it to a charm.

I stitched the thistle using a stitch called Turkey Work. It's a method of securing loops onto fabric, stitched in rows. The closer your stitches, the thicker the pile. I use my fingers to hold back the previous loops while I stitch the next row.

You'll often see this stitch used for fuzzy bodies, and thistles but I like to use it for puffs and dots as a background or pom poms, and it makes a great afro! Mary Corbet has a wonderful video tutorial for turkey work that you can view here. And lots of other great tutorials for other stitches as well. Thank you Mary!

When you're finished stitching all the loops, it's a mess until you give it a hair cut and trim the pile in the shape you desire.


I always go slowly here because you can't add any back. Trimming also makes a mess too but it's easily cleaned up with some tape wrapped around my finger.


Here's what I learned this week:
  • I forgot how much I missed fine surface embroidery and stumpwork. I think I could work a stumpwork sampler and be very happy. Every one of Jane's books is exceptional.
  • Stumpwork takes some set up time to properly hoop your work, find the wires, etc. but once you've amassed the supplies, it's a joy.
  • There's more to the thistle than meets the eye so I'll have to ponder on that a bit.
Congratulations for persevering through this post. See you next Tuesday for Charm School when I'll be exploring this book...


It's a BEAUTY!!

Tuesday, July 14, 2009

Charm School Week Four: Beadwork

Serenity


Oh, I meant to post this a lot sooner today but my life conspired against my sitting down to write...*sigh

But, here I am, introducing "Serenity" -- my fourth Summer School Charm -- which is a bit ironic since I've felt anything but serene these last two days trying to catch up with everything after vacation. And no, after that great week, I'm not complaining...

I know I said I was going to cover stumpwork this week but I had a bit of a problem when I forgot to take my book to the beach with me. Well, I made do with what I had in the bottom of my travel bag... So, this week's charm is from the book, The Beaded Garden by Diane Fitzgerald. It's such a great book, in fact, my beading friend Dot Lewallen has also been using it for Summer School too!


This week I used the instructions in the book to make these tiny little blue bell flowers. The first two I scrapped because my tension wasn't tight enough -- it's a little challenging to hold those teeny tiny flowers. I used 15/0 seed beads for the final three. The book recommended I use cylinder beads (like delicas) since their uniformity of shape makes the herringbone stitch look like the herringbone pattern...

Unfortunately, I only had 11/0 cylinder beads which made a flower that was too big for what I wanted. So I switched to 15/0 seed beads and I was very happy with the result.


This week I also learned how to use a dremel drill to drill small holes into seashells which allowed me to use this beautiful scallop shell as the backdrop. My husband had to order drill bits small enough and I was delighted to successfully put a hole in a shell--see it??


This was my first power tool in Summer School -- maybe I should call it Summer Shop. Do they even still have "Shop" in High School?

I wanted a more textured look than beads alone could give me so I took apart a few flocked forget-me-knots, removed the stems and stamens, attached a bead and a beaded stem, and added them to the flower arrangement.


Here's what I learned this week:
  1. I've been using short, size 11 beading needles for my bead embroidery. I found a longer, smaller size 12 beading needle was much better for bead weaving. You experienced beaders out there probably already knew that!
  2. I found that using a thicker beading thread helped to keep friction on the inside of the bead hole which helped to keep the tension tighter. I moved from a size 0 Nymo thread to a size D. (Note: Thanks to Timaree for pointing out that I used size B thread -- I had an unmarked spool and am always confused as to which is smaller B or D -- now we know, it's B...)
  3. I learned you have to put a lot of pressure on a drill to make the hole -- no pressure, no hole...and definitely wear safety glasses. There were lots of bits of shell flying around!
Forgotten book and all, I'm really pleased with this charm. I think I love the scallop shell the most -- I can see all kinds of beautiful things nestled inside a scallop shell now -- wouldn't it make a cozy bed for a fairy?

Stay tuned for next Tuesday's Charm School where I will be trying my hand at stumpwork.

And thank you for all the kindness about my vacation photos. It's going to take me a few days to get caught up on my blog log. *smile

Tuesday, June 30, 2009

Charm School Week Three: Whitework

Charity


This week's homework was the A-Z of Whitework published by Country Bumpkin. This book covers EVERY type of whitework I can think of except for pulled work which they claim will be covered in a future book. This book is definitely worth the price of admission as it is a tremendous resource for many different types of stitches -- for whitework, for crazy quilting or any other type of surface embroidery. I saw stitches in this book that I have not seen in any other book...

For my charm this week, I decided to try cutwork. I had never made anything using traditional cutwork techniques in my life...with the exception of hardanger. Unlike hardanger which is stitched using a counted method, I tried my cutwork "freehand" on a old piece of linen I had. Well, I can see how cutwork might become rhythmical, and I did enjoy it...


But, it might take an entire table cloth's worth of practice before my stitches would begin to look more uniform...My stitches were a little wonky but I guess that's part of the charm of handwork *teehee hee

It was really fun when it was time to cut away the interior parts...


and to see the heart pop forward in relief...so sweet!


And, I did try a new stitch called "pin stitch" to attach the linen heart to a ribbon I used to back the charm. Pin stitch is used for appliqueing two pieces together in Madeira embroidery ( I just learned that! -- who knew??). I couldn't find an online reference to show you, sorry about that...but it was quite nifty because it leaves your stitching on the back very even-- I also added a bead to my thread while pin stitching and that saved me the extra step of beading...I could applique and bead at the same time. Nifty little stitch...I just might have to show it to you another time.

And I used a wide rayon ribbon, folded in half to back the linen heart (see, with ribbon, I don't have to worry about seams and I was running late)...


So, what I ended up with this week, is this sweet little charm called Charity. And I know a lot more about what's in my whitework book.


Next time, I'll be covering stumpwork in one of Jane Nicholas' books...I'm just not sure which one yet...And, it won't be next Tuesday but the Tuesday following, July14. Next week I'll be on Summer Break from Charm School.

That's good. I just might take me two weeks to figure out stumpwork...

Have a great day and thanks for stopping by.

Related Posts with Thumbnails