Monday, February 21, 2011

Lacing

Sorry folks.


Today's post isn't sexy at all.

It's boring. But necessary. Even important. But definitely not sexy.

The topic is lacing. It's what we do at the end of a project to give our needlework a finished look.

Scarlett O'Hara recognized lacing as the critical step she needed to endure in order to get that nothing of a waist into her ball gown.

But this picture of she and Mammy is the only sexy picture in this whole post. Now you've been warned so no complaining later...

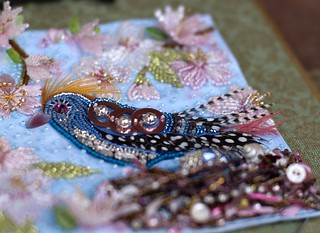
Over the weekend, I laced and finished all eleven of my bead journals and submitted seven of them to the Woodlawn Needlework Show. (Yes, I decided to go for it.) And now I have the callouses and split fingers to show for it.

As I was lacing piece number 8, I finally remembered all of you....you lucky people.

And thought that maybe someone somewhere out there may need some tips on lacing. The rest of you whippersnappers can skip over this post and wait for a more sexy topic to emerge...

Warning: A high degree of patience is required for this activity. Lacing should not be attempted while consuming alcoholic beverages.

Step One: The Materials

  • Finished work
  • Acid-free foam core (I purchase from the framing department at Michaels or JoAnns)
  • Exacto knife for cutting foam core
  • Darning needle
  • A photocopy of the back side of your work
  • Warm and Natural batting (it's thin and 100% cotton, from JoAnns)
  • Upholstery thread
  • Sturdy pins
  • Tekobari or other long laying tool
  • Your knees
Step Two: Template and Layers

Robin Atkins taught me to take a photocopy of the back of my work. This gives a template to cut out the foam core in the exact shape of your finished piece. This was a brilliant step since most often our hand work changes sizes as we work the material. I always mark the back with a "T" for top.

Cut out the foam core with an X-acto knife using the photocopy template.

Cut Warm and Natural batting layer about a 1/2" wider than foam core.

Layer work (face down), batting and then foam core -- taking care to make sure that the tops are, indeed, all at the top...and that the edges of the foam core line up with the edges of your work.


Step Three: Summon your patience

Lacing is tedious especially when you have work that is highly three-dimensional like mine. Best to have limited distractions and lock up your children before you begin.

Step Four: Stretching and Pinning

Starting at top-center, begin pinning and stretching work working from the center out toward the edges, pushing pins into the foam core to hold the stretched fabric.
Once top and bottom are pinned, flip work to the side and pin and stretch from center working out toward edges...


When finished stretching and pinning, you will have pins all around your piece and you're ready to start lacing.

Step Five: Lacing

Using your darning needle, thread up a lot of thread -- you don't want to have to start a new thread if you don't have to. For larger pieces this is unavoidable. I used 6 yards of thread for each of these 5" x 5" pieces.

A note on the thread. I like Upholstery thread. It doesn't break and it has a twist that grabs the fabric and helps to keep your thread taut as you lace.


The goal of lacing is to certainly to have a stretched piece of needlework with even tension, without bumps and bulges. To me, the back also should have as little bumps and bulk as possible.

I lace the top/bottom first and then the two sides. Before I start, I trim the fabric at the corners to eliminate the excess bulk.


Also to reduce bulk, I use a half-hitch knot to get started. Do not knot your thread. First, I wrap my thread through the same starting hole about three times. Then, I slide my needle under the three wraps and make three half-hitch knots to secure my beginning thread.


Then I lace by slipping my needle from under the fabric, catching both the batting and the fabric, as I lace back and forth.


Notice my knees in this picture. I always hold my work between my knees as I lace so that the front of the work isn't smooshed in the process.

When I reach the end of the row, I wrap my thread around the final pin a few time just to temporarily hold it.


Then I take my laying tool, and go back over my lacing stitches, using the tool to pull the stitches tighter and my free hand to hold tension as I work my way back to the last pin.


Remove the pin and release the thread, keeping tension on thread. Holding lacing tight, I make a tacking stitch or two to hold the lacing in place before I begin lacing the sides.

Repeat for the sides. Remove all pins.


Step Six: Tack down corners

Using a sewing thread, I tack down the corners to make an even smoother backing. Sorry, no picture for that.

Step Seven: Sew on backing (optional)

If you are framing your piece, there's no need to put a cover on the back.

For my bead journals, I am having a friend make a shadow box and I plan to rotate my pieces through the frame as my mood dictates. I was trying to avoid the expense of framing them all individually.

I chose ultrasuede to cover my lacing and used the same photocopy template to cut the ultrasuede to the right size, taking care to match the tops together. Ultrasuede is expensive but is great as a backing fabric because it stretches and conforms as you stitch and the individual stitches sink nicely into the fabric and are hidden.


I then added a label to the back identifying the piece and my name and address. I should have put the date too so I'll add that when it comes back from the show.

That's it.


The only other thing I did was place each journal into a box to keep them from being crushed in travel and storage. I will also put the story of each piece inside the boxes for posterity and safekeeping.


And so, to the friends who are still here after this arduous post, I wish you all the best with your lacing.

It's not sexy. But it is rewarding.

If you spend so much time working on the piece itself, it makes sense to take some care in finishing it properly.

And please. Feel free to share any tips or tricks that you may have for successful lacing. I'd love to hear them.

Friday, February 18, 2011

iPad and Embroidery

Ok. I know I'm lucky. I've got a man who understands me.

And rather than buy me diamonds and pearls...he bought me an iPad.

I'd heard all the hype about the iPad but I'm not sure I got its potential until I became close friends with my iPad. I'm not kidding. This tool can do everything but fly. I can read mags and books, track my diet, keep my to do lists, play scrabble, display my photographs, get my email, read blogs...etc etc etc....

It's only limitation is that the rest of the world hasn't caught up with it. IMHO, there's no reason to ever receive a print magazine again. And I know that there are a few publishers who are dabbling in the concept of an E-mag...

Quilting Arts made a special issue which was great but expensive and a one-shot wonder....And I completely LOVE the electronic versions of Selvage...but there needs to be an iPad version.

And the same for our stitching books. They should all have an iPad version! So, my hat is off to Judith Baker Montano and C&T publishing for creating an App for embroidery and silk ribbon embroidery stitches.


For $3.99, I bought the Advanced Embroidery stitches...which included 55 stitches...how-to instructions and videos...I love the convenience of not to having to carry books everywhere. I thought it was expensive and the digital quality of the pictures at full screen size was not what it should be. I also couldn't access the versions for purchase through the App store which was confusing...I could only access that through their free app which I had to download first...But the instructions are clear and the videos of Judith herself discussing all types of topics like threads and color...are great.

But it's this other app that I discovered this morning that has me bouncing off the walls with excitement! And it's free!

It's called FAshion Mag and it's all the embroideries from the Spring/Summer 2011 fashion collections with close-ups for America, Milan and Paris/London....There are hundreds of great closeups of handwork...


And it turns out that fashion mag has apps for Knitwear, Accessories, Bijoux and Shoes! And they're all free! Now that's enough inspiration to last for weeks!!

Too cool. Come on needlework industry...kick it into gear!!

Wednesday, February 16, 2011

Royal Threads

I absolutely love this photograph taken by the talented Tim Walker of Helena Bonham Carter in the March 2011 Hollywood issue of Vanity Fair!


The Diet Coke, the chippy nail polish, the crooked crown, the shabby sash...

This amazing actress is playing yet another queen after her great performance as the Red Queen in Tim Burton's Alice in Wonderland. She is playing Queen Elizabeth to George VI in the movie, The King's Speech, which I am SO excited to see this weekend...

Seems like there is so much talk of royalty these days with the impending marriage of William and Kate. I have to admit I get swept up by it all and thought that this modern wedding sampler designed by Jacqui Pearson of Granny Knits, to be published in the upcoming March issue of UK mag Cross Stitcher, was kind of fun...


I don't plan to stitch it but it's cute and a far cry from the more formal samplers I've seen in the past...like these two that were stitched for Charles and Diane courtesy of Linens and Royals blog....


Beth Russell also created this needlepoint design to honor Will and Kate's big day:


And Mr. X Stitch and Subversive Stitcher created this design for cross stitch...


If you have any pictures of vintage royal wedding samplers, I'd love to see them.
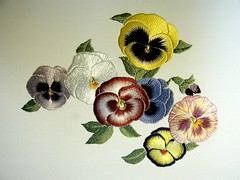
I remember seeing some very old ones of Victoria and Albert and even Queen Elizabeth I but couldn't find them in time for this post.

The weather is warming and the birdsong has returned. Who needs Punxsutawney Phil...just walk outside!

Tuesday, February 15, 2011

Tote-ally Cool

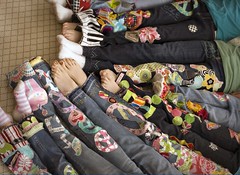
My brother and his girls came over this weekend. These two showed up after being at a birthday party...


Why didn't they have parties like that when I was a kid? It sure beats "Pin the Tail on the Donkey"...

The girls came over to embellish the canvas tote bags I gave them for Christmas.


Since their parents have gotten divorced, they spend lots of time going between Mom and Dad so I thought they needed totes to keep all their important stuff ie. hair bands, games, books, pencil rolls, Cozies, iPods...


Honestly, when I first gave them to them they were thinking...."Why is Aunt Susan giving us these dorky looking canvas bags?" But their good parental training kicked in and they knew better than to say it out loud...


Well, I think I redeemed myself on Saturday when I pulled out the stash and they got to spend all day embellishing their bags.


I know I enjoyed it at least as much as they did...I love to see what they create and how their minds work while they're doing it.

I've learned a few things over the years working with the girls...

First thing....They enjoy the present so much more if they have had a hand in designing and creating it.


And second, if you happen to have a child who tends towards perfectionism and gets stuck often because of her inability to make her vision come out perfectly...

Drawing the design on paper ahead of time versus launching directly into the process works much better.


The two older girls mentioned how much they loved getting to spend the whole day making something.

See the Cozy tucked under her legs? Makes me smile...

In these days of overscheduling and busy-ness, it made me think that children might yearn for creative retreats as much as we do.


Which leads me to an idea for next year...

Monday, February 14, 2011

Re-discovering Love

Yesterday, I had my nieces over to embellish tote bags. While I was pulling out supplies for their day, I discovered this Valentine's Quilted Jacket that I made over 10 years ago...


Except I never actually sewed the pieces into a jacket.


I suppose that finding it means that I'm supposed to finish it.

I have thought I might like to embellish and bead it but then I'm not sure how to quilt it to the sweatshirt backing if I put all of that embellishment on it...


Maybe I should quilt it first and then embellish it but that might look funny.

This is where I get stuck because I'm not really a quilter. I have no problem sewing the blocks but then making it into something is my Achilles heel.

I really love hand applique though...and I'd forgotten about that.


I put a lot of what I love into these blocks. Like this popcorn tub I made in honor of my husband Jim. He makes the best homemade popcorn ever and it's his favorite food...

And this block tells you exactly how long this project has been in hiding...


That was Jack's hand at 3 or 4 years of age, compared with his hand this morning.

Jack is home sick today so I'm nursing him with the healing tea and some Valentine's donuts...


I hear they have loads of healing properties.

Happy Valentine's Day everyone...


I hope you celebrate someone or something you love today.

Related Posts with Thumbnails