Today's post isn't sexy at all.
It's boring. But necessary. Even important. But definitely not sexy.
The topic is lacing. It's what we do at the end of a project to give our needlework a finished look.
Scarlett O'Hara recognized lacing as the critical step she needed to endure in order to get that nothing of a waist into her ball gown.
But this picture of she and Mammy is the only sexy picture in this whole post. Now you've been warned so no complaining later...
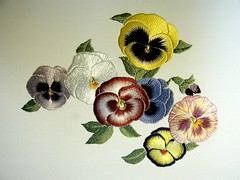
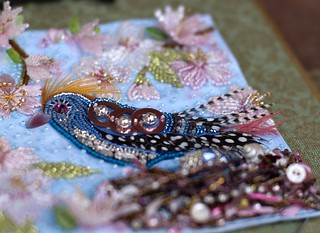
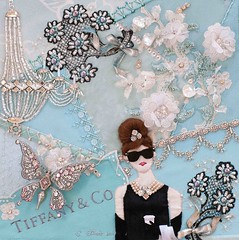
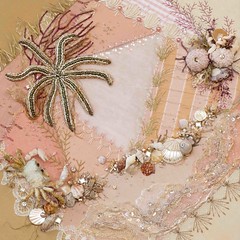
Over the weekend, I laced and finished all eleven of my bead journals and submitted seven of them to the Woodlawn Needlework Show. (Yes, I decided to go for it.) And now I have the callouses and split fingers to show for it.
As I was lacing piece number 8, I finally remembered all of you....you lucky people.
And thought that maybe someone somewhere out there may need some tips on lacing. The rest of you whippersnappers can skip over this post and wait for a more sexy topic to emerge...
Warning: A high degree of patience is required for this activity. Lacing should not be attempted while consuming alcoholic beverages.
Step One: The Materials

- Finished work
- Acid-free foam core (I purchase from the framing department at Michaels or JoAnns)
- Exacto knife for cutting foam core
- Darning needle
- A photocopy of the back side of your work
- Warm and Natural batting (it's thin and 100% cotton, from JoAnns)
- Upholstery thread
- Sturdy pins
- Tekobari or other long laying tool
- Your knees
Step Two: Template and Layers
Robin Atkins taught me to take a photocopy of the back of my work. This gives a template to cut out the foam core in the exact shape of your finished piece. This was a brilliant step since most often our hand work changes sizes as we work the material. I always mark the back with a "T" for top.
Cut out the foam core with an X-acto knife using the photocopy template.
Cut Warm and Natural batting layer about a 1/2" wider than foam core.
Layer work (face down), batting and then foam core -- taking care to make sure that the tops are, indeed, all at the top...and that the edges of the foam core line up with the edges of your work.

Step Three: Summon your patience
Lacing is tedious especially when you have work that is highly three-dimensional like mine. Best to have limited distractions and lock up your children before you begin.
Step Four: Stretching and Pinning
Starting at top-center, begin pinning and stretching work working from the center out toward the edges, pushing pins into the foam core to hold the stretched fabric.
Once top and bottom are pinned, flip work to the side and pin and stretch from center working out toward edges...

When finished stretching and pinning, you will have pins all around your piece and you're ready to start lacing.
Step Five: Lacing
Using your darning needle, thread up a lot of thread -- you don't want to have to start a new thread if you don't have to. For larger pieces this is unavoidable. I used 6 yards of thread for each of these 5" x 5" pieces.
A note on the thread. I like Upholstery thread. It doesn't break and it has a twist that grabs the fabric and helps to keep your thread taut as you lace.

The goal of lacing is to certainly to have a stretched piece of needlework with even tension, without bumps and bulges. To me, the back also should have as little bumps and bulk as possible.
I lace the top/bottom first and then the two sides. Before I start, I trim the fabric at the corners to eliminate the excess bulk.

Also to reduce bulk, I use a half-hitch knot to get started. Do not knot your thread. First, I wrap my thread through the same starting hole about three times. Then, I slide my needle under the three wraps and make three half-hitch knots to secure my beginning thread.

Then I lace by slipping my needle from under the fabric, catching both the batting and the fabric, as I lace back and forth.

Notice my knees in this picture. I always hold my work between my knees as I lace so that the front of the work isn't smooshed in the process.
When I reach the end of the row, I wrap my thread around the final pin a few time just to temporarily hold it.

Then I take my laying tool, and go back over my lacing stitches, using the tool to pull the stitches tighter and my free hand to hold tension as I work my way back to the last pin.

Remove the pin and release the thread, keeping tension on thread. Holding lacing tight, I make a tacking stitch or two to hold the lacing in place before I begin lacing the sides.
Repeat for the sides. Remove all pins.
Step Six: Tack down corners
Using a sewing thread, I tack down the corners to make an even smoother backing. Sorry, no picture for that.
Step Seven: Sew on backing (optional)
If you are framing your piece, there's no need to put a cover on the back.
For my bead journals, I am having a friend make a shadow box and I plan to rotate my pieces through the frame as my mood dictates. I was trying to avoid the expense of framing them all individually.
I chose ultrasuede to cover my lacing and used the same photocopy template to cut the ultrasuede to the right size, taking care to match the tops together. Ultrasuede is expensive but is great as a backing fabric because it stretches and conforms as you stitch and the individual stitches sink nicely into the fabric and are hidden.

I then added a label to the back identifying the piece and my name and address. I should have put the date too so I'll add that when it comes back from the show.
That's it.

The only other thing I did was place each journal into a box to keep them from being crushed in travel and storage. I will also put the story of each piece inside the boxes for posterity and safekeeping.
And so, to the friends who are still here after this arduous post, I wish you all the best with your lacing.
It's not sexy. But it is rewarding.
If you spend so much time working on the piece itself, it makes sense to take some care in finishing it properly.
And please. Feel free to share any tips or tricks that you may have for successful lacing. I'd love to hear them.







22 comments:
Don't have up-tempo music on. You might think it helps you work faster, but you are quite right, Susan, slow and careful is what gets good results!
those look fantastic! but i expect that from you, all your work is stupendous !!
A big thank you for this tutorial, you gave lots of great advice here.
Can't wait to see the finished products!!
Glad you are submitting your work to the show.
I never knew about lacing, though I do know someone that put her pages on canvas so I suspect she did something like this. It really does give the work a finished appearance...professional.
You have so much to share, Susan.
Thank you!
xx, Carol
Very interesting post, Susan. I planj to try it on some of my cross stitching, thanks!
Great post...love all the pics...I'm a 'show me' kind of gal!! thanks again!
Ruth O'Leary http://rutholearytextileart.blogspot.com/search?q=lacing
has several entries on lacing. She used hardboard rather than foamcore.
You might be interested in having a gander.
I am so grateful for this post. It sure helps me get my mind around finishing a piece. I have a couple of things that definitely need to be finished and I have been sort of at a loss. Thanks again. Great detail.
It's a stunning and gorgeous work. I love it!!
thanks
anne
Pleased that you decided to enter them in the show. Lucky peps who will get to see them for real.
I have to lace Loving Couple in the coming week. It is a bit too large for me to hold between my knees. I will choose my softest, fluffiest towel and fold it into a pad, then cover that with tissue paper. I will place the embroidery face down on the tissue paper and take care not to move it around too much while lacing.
I've never measured how much thread it takes but the board for LC is 10x12 inches and I know there will be lots and lots of pulling the thread through!
Wish me luck with the lacing. I wish you luck with the show (not that you'll need it).
What a great tutorial, Susan! I want to tell you that I really appreciate how much work you put into your blog and that I can only imagine how long it took to write up this tutorial.
I am so glad that you are entering your beadwork in a show! I really meant to email you much earlier to tell you to go for it. I've had nothing but really great experiences when I've entered some of my handmade things in shows. The work it takes in getting everything prepared is so definitely worth it. Your beadwork is so incredibly beautiful and I know that people will be blown away when they get to see it close up.
"Today's post isn't sexy at all."
Well Geez. I'm leaving, then. ;)
One, wanted to say that I am so glad that you entered. I'll bet this will be a giant ego boost because you'll be amazed and gratified to see how much everyone is going to go bananas over your work. Well worth going for it, and I'm so happy that you did it!
Two, also wanted to say this is one of the best pictorial tutorials I've seen yet on how to do the lacing. When I was trying to finish my name tag using this method, I couldn't find any resources (and I looked!) that really spelled the whole process out in a way that I could see it, and follow along with it. I ended up talking to a few people, kind of got started, ended up just going for it, knowing that it wasn't great and knowing it needed to be redone, but am living with it fine for now. However, this is a great set of step by step instructions. Very nice job, Susan, as usual. All around. :)
Thanks for all of the lacing tips as I will use them in lacing my cross stitch prior to framing - if I do it myself.
Your beadwork is beautiful! Good luck in the show.
Happy Stitching/Beading!
Thank you so much for sharing this technique. I've framed a few of my needlework pieces in the past, but really had no idea what I was doing. They look presentable, but I always felt there was something more *complete* and long-lasting I could be doing. Now I know just what it is!
Hi susan
I can picture those poor fingers. I did a couple of pieces of Brazilian Embroidery and they taught me a similar method except you used little tiny 1/2" or so pins and they were pushed right into the foam board and stayed there. They were put in very close together almost touching and then you trimmed your fabric after all was pinned and just taped it down.
They still look good and tight.
By the way The Kings speech was wonderful and am glad you are going to see it. I think I would just like to bring Colin Firth home with me so we could enjoy him and his humour. The interview on 60 minutes Sunday night gave you a taste for what a guy he is.
Hugs
FredaB
Glad you decided to submit your beautiful pieces.Thanks for the tutorial Susan.There are a couple of tips you have given that I think will make the job easier. I'm just about to start lacing a piece of stumpwork that has been a UFO for a while,so wish me luck.
I never found lacing tedious or difficult, and I learned to do it by starting to lace from the middle to one end, then go back to the middle and lace to the other end. Harder way to go, I think.
I had never seen this technique before. It looks like a very good way to secure your work. I can't help but wonder if there is an easier way.
Thank you for a great and clear tutorial. I have a counted thread project that is ready for this stage.
Your beaded work is, as usual, wonderful.
These are beautiful! If I get to Woodlawn this year, I'll definitely look for them.
I saw and greatly admired these little 6x6 (?) beaded squares at Woodlawn, too. They are certainly stunners in person! Your imagination is an inspiration.
Jane, president of the Susan Fan Club, Chilly Hollow chapter
Post a Comment