Showing posts with label figures. Show all posts

Thursday, April 25, 2013

A Good Hair Day

It was a good hair day for Mrs. Rose...


And she needed an ear to tuck her hair behind so I gave her one of those.

And then I pulled out this hoggett fleece I had tucked away in "Mrs. Rose's collection box".  I had bought it a few years ago at the Maryland Sheep and Wool  festival, thinking it was perfect for old-lady hair.


Evidently "hogget" means it's the very first sheep's fleece so the tips on the end have the original baby lamb wool.  You probably knew that already but I didn't.  Now when I go to Sheep and Wool next week, I'll actually know what I'm looking at...kind of...

I also crepe-d the old girl's neck and put the creases back in her face.  She was looking way too young for that gray hair on her head.


It feels so good to be underway and over the big task of her body, face and hair.  It feels really good...

See you next time.

Wednesday, April 24, 2013

Mrs. Rose Takes Her Seat

Albeit in her birthday clothes...


I wasn't quite sure how to make a three-quarter doll...so one arm and one leg are completely three-dimensional while the leg and arm closest to the wall are two-dimensional, stitched around a piece of Timtex and appliqued onto the ground fabric.

My friend and mentor, Canby helped yet again when she suggested that I attach all the body parts to a "slip" that I create from the negative space of the chair.

So, I traced the chair onto crinoline...


Cut out the area where the chair would go, and pinned the body parts of Mrs. Rose onto the slip based on my pattern of where the head, arms and legs should go...


I then basted and stitched the body parts onto the crinoline cutting away the excess and leaving only the body parts stitched in place to the crinoline.


The slip allowed me to move the body as a unit in the chair while maintaining the anatomical proportions.  So, I played with moving her forward, back, up and down until I decided on the placement I liked best.

Once that was finished, I was able to applique the pieces down onto the ground fabric with confidence in the placement and position of all those body parts.


Through the applique process, Mrs. Rose lost some of her sculpted facial features as the stuffing was pushed forward by the background cloth so I'll have re-do some of the sculpting.

Not sure what will come next her dress or her hair.  On the one hand, her poor head has got to be cold; on the other, I'm sure her body is too.  And, most people do their hair after they get dressed so maybe I'll do her dress next.

Happy sitting, my friends...

Monday, April 22, 2013

Patience and Putting the Pieces Together

Patience is one character trait that I feel blessed to possess.

Patience is my constant, faithful companion no matter where I travel, down whichever road my embroidery leads me.

This time I really needed Patience since Mrs. Rose was taking me right into doll making territory and I had no idea what to do next.  I needed her more than ever.


One might be tempted to think of Patience as a passive activity... a waiting-around for something or someone.  In reality, a lot of work is being done when I'm patient and I'd liken it more to a period of concentrated strength.

When last we left, I was heading to a mentoring session with Canby Robertson, needlework designer and teacher. Unbeknownst to me, Canby had begun sculpting faces for dolls one weekend after she and her cousin sat down to watch a video by doll artist Akira Blount, Art Dolls: An instructional Documentary Part I:  Heads and Hands.

Akira Blount is an award-winning doll artist.  And though her video is no longer available, I did see that you could rent it on SmartFlix for $9.99.  If ever you wanted to learn soft sculpting and techniques for heads and hands...I highly recommend it.

So...while Canby was sculpting doll faces using Akira's method,  I was struggling to sculpt my little profile face into an old lady face.  When Canby realized this she said, "Susan, you have to watch this video.  I know it will help you."

And so, she loaned me her DVD and I have been changed for the better.   I was amazed at the sequencing of stitches that Akira Blount had perfected over time to properly sculpt the features...how to take one stitch from the corner of the mouth to the ears to get the proper curvature of the mouth, how to sculpt a nostril, an eye socket...etc.


That Buddhist proverb comes to mind..."When the student is ready, the teacher will appear."

Lucky for me, both Canby and Akira had shown up just in the nick of time.

They both had helpful suggestions for shading the face...the video recommends using burnt omber and ochre for enhancing detail with an emphasis on not overdoing it...


Canby pointed out the use of a purplish light brown color to use as undertones around the eyes and mouth...this was brilliant (the color is where the brush tip is sitting in the  pic below)...


This color helped to give the right purplish/bluish cast that real skin tends to have...especially older folks.

Likewise, she noted that often the cheek, nose and chin highlight should contain a bit of yellow.  Again, not something I would have ever known on my own and yet it seems to work.  I used both colored pencils and chalk to achieve the facial shading...


Originally I had planned on embroidering the eye but I was concerned that embroidery stitches would crush the sculpting of some of the features of the face so I decided to paint the eye and eyelashes instead.

Right now, Mrs. Rose is in pieces with excitement in anticipation of meeting all of you.   Jack felt sorry for her bald head so he loaned her his red hat...


Now she's ready to cheer on Boston.

And me?  I'm grateful that I'm over this hump, that my teachers showed up when I needed them, and that my vision is starting to come to life.  There's lots more to come with hair, eyeglasses, shoes and clothes...

Not to mention getting her old body put together.

Patience really is a virtue.  Happy Monday everyone.

Wednesday, March 20, 2013

Facing My Figural Fear

Usually when I disappear in the middle of a project, I've either gone out of town or I'm stuck on something.

Unfortunately, this time I've been stuck.

Placing human figures in my work has always been challenging.

In fact, many times in the past few days, I wanted to stop working on this piece and start working on a flower garden or something.  But I didn't.

No matter how often I struggle to make faces and figures, they still keep crossing my path and demanding to be included in my work.


Well, I have a habit of listening to these messages from the universe so...here I am back at it.

And since they keep coming up over and over, I'd better practice and improve so that it becomes less onerous.  Enter Adele Sciortino and her online doll classes.

A few years ago Gerry Krueger told me about Adele's newsletter (it's free) which is full of tips for making dolls and doll items.  Thanks to Gerry, I've taken one class on making doll shoes and I'm currently enrolled in the Wigging with Mohair class.

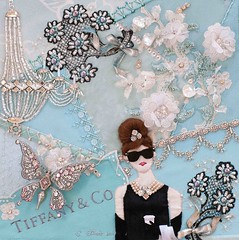
After working with mohair for Audrey's hair, I knew I could use some help with better managing this tricky, flyaway fiber.  Even though I am not making free-standing dolls, I'm already learning some valuable tips.  I've ordered some gray mohair off of Etsy for Mrs. Rose's hair.

Needleworkers have been putting figures into their work forever.  You see figures in goldwork, figures in stumpwork...


And I have found lots of inspiration from current artists such as Salley Mavor.

After my last post, I started reading The Embroidered Portraits book by Jan Messent.  She has tackled this topic thoroughly and gives great tips on how to embroider faces and place ears, eyes, nose etc.  Thank you Jan...I'm finding it very helpful.

I'm also using Barbara Willis' Cloth Doll Artistry book for tips on sculpting the body, arms and legs.

Each time I've had to make a face, I haven't drawn it freehand.  Instead, I find a picture and trace the placement of nose, eyes, ears and mouth.  That way, I'm not depending on drawing skills that I don't have.

For Mrs. Rose, I decided to use that Annie Wahl doll that I have in my collection.  She was kind enough to pose for me, and didn't mind getting shot in her skivvies...


She says she's proud to show off the body that got her this far in life.

I then traced her outline to make a doll pattern for the head and the body.   Once I was satisfied with the pattern, I used my copier to reduce the paper doll to various sizes...


I cut them out to place them on the block.  This helps me choose the correct pattern size.  It looks like a reduction of 55% will work.


I know, I know.  She doesn't look so good bald and pale like that...I suppose I didn't look so hot either when I was first born.

Now onto choosing the materials.  I ordered some Doe Suede (it's a polyester) from Adele's site since I had never seen that before and wanted to try it.  I also have some flesh colored kona cloth.  And I located some old pantyhose to try as well.


Today, I'm off to play around with my pattern and my materials to see what happens.

Thanks for hanging with me.   I hope to get to some "flow" with this piece soon.

Ankles crossed...

Related Posts with Thumbnails