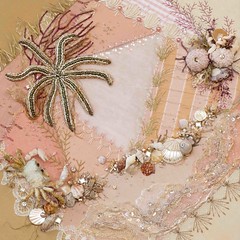
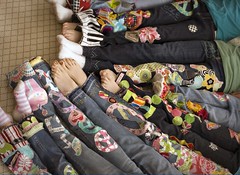
I've been in and out of the nest a lot in the past 10 days, having gone to the beach for the good part of a week. Before I left last weekend, the baby bluebirds looked like this...

Since they're facing in opposite directions this time, it reminded me of the yin yang symbol. Yin Yang is used to describe how polar or seemingly contrary forces are interconnected and interdependent in the natural world -- Like the point at which the birds are most fully in their nest is also the point at which they must depart and the nest empties again.
When I returned home to my nest, they had fledged from theirs.

I finished embroidering my bluebird heart in their honor, wanting to keep it simple since my plan is to be able to wash this skirt. I have to admit that it was tempting to try to make the little birds three-dimensional...but I resisted.
Now I think they need a nest to sleep in...so that's what I'll stitch next.

If there's anyone interested in stitching this little bluebird heart, here's the pattern. I'll leave it up on this post for about a week, at the end of which, the pattern will go away.
 Looking forward to catching up with you on my blog reader. I feel a bit "out of it" even though I've read lots of books, taken a couple of classes and attended to many tasks on the homefront -- I have really missed all of you. Give me a few days and I'll make it around~!
Happy nesting!
Monday, August 2, 2010
In and Out of the Nest


Tuesday, July 6, 2010
Dressing the Fourth


Thursday, March 25, 2010
Cate's Jacket is Finished
I finally finished Cate's jacket and am sending it off to Texas today.
I was pleased with how all of her choices turned out...
The fabrics looked great...
And so did her ribbon choices...
And the peace signs were the same style that we used in Pants Pants Revolution...
With those fraying edges...
I had to add a few special touches myself ~~~
I used all those fun stitches on my sewing machine in different colors to give the collar a little more pizazz -- I thought they looked great against the white background.
A little monogram "C "...
And a special label for the inside.
I printed a mirror image of the label onto transfer paper and ironed it on...It came out a little light and smudged so I went over it with a micron pen and it looks just ok. Perfection is overrated anyway.
And I LOVE how this froggy turned out!!
It's a rhinestone applique from MJTrim with a tongue and fly a la Aunt Susan...
It's by far my favorite part.
By far...*smile Now I'm off to make more leaves...oh, and to find those little file folders Cate asked me to send...
Oh, and I haven't forgotten about stitching my story...but it probably won't happen until this Summer...
[Note: For those new to my blog, you can see Cate's Design Book on this post which I sent to Cate to help her design her own jacket...And you can read about Cate's design choices here.]
Sunday, February 21, 2010
Cate's Design Book

I know I'm always talking about my nine nieces. But I have a tenth niece. Her name is Cate and she lives in Texas so I don't see her very often. But when we spent a week on the Disney Cruise together, she told me something I hadn't realized before.
Sitting in this porthole one afternoon, out of the blue, she said, "You are my favorite Aunt."
"I am?", I asked. I was a little surprised, that was pretty high standing for an Aunt you only see once a year. "Well," she explained while rolling her eyes, "You are my only Aunt."
"I am??" Hmmm. I am.
I hadn't realized that. I'm so used to having so many women around here in Maryland that I'd forgotten that there weren't nearly as many in Texas with Jim's family.
Something shifted inside me that day. I suddenly felt more responsible and part of the inner circle of female role models that Cate will use to shape her life and her character.
And since I don't see her very often...only at Thanksgiving...I was more than delighted when my SIL called and asked me to embellish a jean jacket for Cate's birthday.
I have embellished jean jackets before -- But one thing that PPR (Pants Pants Revolution) taught me, is that the girls enjoy the gift so much more when they've had a hand in designing it.
And that was it! Light Bulb! Since she lives in Texas, I can't really have her over to help her make choices so I made this paper bag Design Book to send to Cate...

Now she can design her jacket by herself.
I sewed three colorful paper bags down the center which worked out great because I had built-in pockets to put things...
And plenty of pages for laying out the choices for colors, ribbons, buttons, fabrics (lots of swatches)...

And rhinestones!
At the end, I included a little file to organize her work and send it back in a self-addressed stamped envelope...
And a little chocolate for all her hard work...
And here's a look at everything that's in the book...
Everything including world peace!
If you're interested in going through the book page by page, I have put the entire book on Flickr.
I hope she enjoys the process, that it connects us a little bit and that she ends up with a jacket she really loves.
Well, that was a nice little side trip from what I was supposed to be doing...and that deadline is looming like a big scary monster...
Monday, February 8, 2010
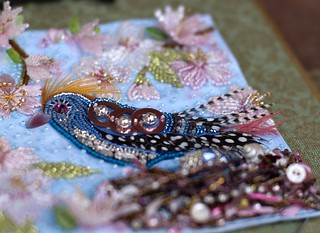
The Little Box of Treasures
It's so tempting. It's like wanting to eat dessert before you finish your dinner.
And that little box of three-dimensional goodies is the prize...the dessert. When I am finally able to attach all of those, it means that the finish line is in sight.
I can't wait for that moment!
But, I know...
If I attach them too early, I'll be frustrated with my thread catching on everything. I have to wait.
I'm so close to being finished. And I'm antsy. I want to move on. I have other things I want to do.
So, I'm trying not to fight that emotion -- I'm trying to recognize it and let it pass through me. Let the peace return.
I'm trying to settle into the final push of needle, thread and beads to complete this piece. And keep stitching. I should be finished soon.
(Just in time for the next snowstorm to hit. I think it will be on Tuesday night. I'm not sure Jack is ever going back to school!)
Thursday, February 19, 2009
Award Ribbon Tutorial
Over the next week or so, I have to make about 6 purses that I've promised people for various fundraising events. The first one is due tomorrow.
I have a lot of yardage of this black/white houndstooth so I thought I would use that as the basis for all the purses. Each purse will be a bit different but they will all use the houndstooth.
I was cleaning up in preparation for my sewing extravaganza when I ran across lots of little bits and snips of fabric and ribbon. I put them all away into zip-loc bags for safekeeping but that got me thinking...
And the Award Ribbon was born. I've noticed award ribbons around a lot lately in the scrapbooking world and that inspired this one made of fabric and ribbon.
I thought this would make a great embellishment for the front of the purse I'm making today. I'm not quite sure yet what I will put in the middle... I think I'll make that decision after I've finished making the purse. I did post a few options at the end of the tutorial if you scroll down.
I LOVE how this turned out. I have dreams of making them for friends' birthdays; for thank you gifts, for special events...you name it. Here's how you can make one of your own. I took step-by-step pics along the way and as soon as I learn how to make it a .pdf, I'll upload it. But for now...
The Award Ribbon Tutorial
1. Trace a circle onto a stiff interfacing material such as Timtex. I used a glass as a template and my circle was 3".
2. Cut out circle. Choose a fabric to cover the circle and cut out about another circle about 1.5" bigger all around. I just eyeballed this...it doesn't need to be exact.
3. Using a needle and thread, sew a running stitch all along the edge of the fabric outside the interfacing circle. This doesn't need to be exact either but be careful not to make your stitches too large or the circle won't gather nicely. Make sure you end your running stitch overlapping where you started.
4. Using the ends of your thread, gather the circle around the stiff interfacing.
5. Iron the circle flat.
6. Now you have the center circle made and it's time to make the ribbon rosette. Gather together snips of varying widths of ribbon -- my snips are only 3.5" long. Press each little 3.5" snip in half...
7. Using your center circle to guide you, arrange the ribbon folds in a circle in a way that is pleasing to you.
8. Pin the snips to the fabric circle.
9. Baste the ribbon in place with large stitches making sure that you are catching each ribbon snip multiple times in your basting stitches. Remove pins.
10. Using a close zigzag stitch on your sewing machine, sew around the edge of the circle attaching all the ribbon snips to the circle. I didn't worry about making my circle sewing perfect... Remove the basting stitches.
11. Voila! You have a blank award...ready for embellishment.  So, if you would like, you could help me out today and vote for which of the following options you think is best for embellishing my houndstooth purse... I put a voting poll over in the sidebar so this could be interactive and we could all see what everyone else thinks. (I love polls! I just always forget about that nifty option in Blogger...)
1st option is blank like the award above.
2nd option: black millinery flower...
3rd option: pink millinery flower...
Thanks for stopping by, voting and I'd love to know if you end up making any of your own award ribbons!