Showing posts with label tambour. Show all posts

Wednesday, June 12, 2013

A Tamboured Garden

When I first spotted this beautiful piece of embroidery...


My heart beat faster and my breathing quickened.  It was love at first sight...


And all that was certain was that I wanted to know more.  Unfolding the textile, I could see that the work did not disappoint.  It's stunning...


An antique, circular table topper...


Embroidered on a net ground using a Luneville or Beauvais hook.  The hook makes tiny chain stitches, also referred to as Point de Beauvais...


This embroidery style came to France via Italy and originated in China.  You can read more about this embroidery style here and read of the Point de Beauvais museum located in Bourg-le-Roi near Normandy.  I hope to visit there one day.  Perhaps you will beat me to it?

I love how design meanders around the folds of the linen cloth beneath...


I notice how the chains stitches meander as well, outlining and filling in the shapes.  The thread travels from space to space without being cut...this saves tons of time and yet, it's done so well that you don't really see it unless you look closely.


See how the leaves below are stitched in one continuous spiral.  After finishing one leaf, the stitcher carried the thread over top of the previously stitched vine to start the next leaf...


It must be very peaceful to stitch this type of embroidery...


Not every vine has a leaf and the nodules on the stems give the vine a more carefree appeal...


And those squiggly leaves.  Don't they just add the right touch of charm?  

There's something playful yet elegant about the piece.  Like a young lady beautifully-dressed who might still let you kiss her behind the rose bushes when no one was looking.

The net itself is an old rose beige...


And the entire circle has a scalloped edge with tiny picots every 2mm...


The reverse side of the chain-stitched flowers are a series of straight stitches which you can see below...


As I fold it back up, I love how the transparency of the net lets me see the embroidery through multiple layers.

Photographing the piece allows me to drink in all its majesty and focus on its details.  It's not a perfect piece.  It has a few tears and holes and one day the fragile, net ground will disintegrate.  Lucky for us to at least have the pictures.

Now I'm off to store it in a flat, cool, dry place in acid-free tissue...


Today I must make some karayori threads for my Japanese embroidery class tomorrow...I'll explain that later.

And Mrs. Rose is patiently waiting for her bower to grow.  I have crossed some hurdles on that front.

Have a beauty-filled day everyone.  See you next time.

Tuesday, June 15, 2010

Getting Hooked: Tambour Beading Masterclass

[Warning: This post doesn't show a finished product and is written for those interested in the details of my class with Bob Haven. It's a bit technical in nature with lots of pictures. If you're not interested in tambour beading, you may want to skip it...]

OK. Let's get to class. The whole technique of tambour beading revolves around the use of a hook...


You can see from the pic that the needle has quite a snaggly hook to it. This makes it quite tricky to manipulate. It's why you won't see very much "finished" work in this post. Only the beginnings of things.


The word "tambour" means drum in French...that refers to how tight the fabric is stretched across the frame. I loved Bob's method for stretching the fabric using 1"x4" pieces of wood, twill tape and clamps from the hardware store. Very inexpensive and very effective.

I have taken many needlework courses in my life. And most of them have been variations on a theme...almost all using a needle and thread. Even though the technique is new, using a needle and thread is not. Not so with the tambour hook.

In the case of tambour beading, there are some unique characteristics:

  1. You work with the front side of the work facing down. So, for many stitches...particularly beading and adding sequins, you are working with the backside up and you either have to feel that your stitching is correct or view it through the back of your fabric.
  2. You work with a hook instead of a needle and the thread is worked from underneath the fabric. You can embroider chain stitches on the fabric, and for this you would flip your work to the front.
  3. If you are right handed, the right hand stays above the frame and maneuvers the hook. The left hand stays below the frame, manipulating the thread and/or the beads or sequins. This hand sequence is the same in Japanese embroidery so it wasn't completely foreign to me.
By far, the trickiest thing to get used to was using the hook.

Twisting and snapping the thread into the hook, rotating the hook, and then pulling the hook back up to the top.

This is much easier said than done since that little snaggly hook spends most of its time snagging the thread or the fabric when in the hands of an inexperienced user like myself.

Day one, we framed our fabric, traced our design and practiced using the hook. I spent most of the day trying to make chain stitches...just to get used to the movement of the hook in my hand. And this is all I completed...


The next day, we attached gold lame fabric with the hook and then trimmed away the excess. My mind started to wander when thinking about all the possibilities of layering sheer fabrics on top of one another...


We then outlined the gold lame with black bugle beads with the fabric facing down. Since the gold lame blocked my vision, I had to place the bugles by feel. I missed one or two...thinking I had it in place only to find out that they had slipped out of my fat fingers.


Placing the beads around the outside edge of the egg shape and the gold beads around the edges of the flowers was much easier since I could see through the silk organza on which we were stitching.


The only other tool I needed was longer fingernails! I always keep my nails really short and this is one case where having a long thumbnail and pointer fingernail would have made the placing of beads and sequins much much easier.

By the third day, we were beginning to place sequins in a row and learning how to attach them on the flowers. And this is about as far as I got since I left a day early. There were however, many of my classmates who didn't even start on their "egg". They continued to practice trying to get the hang of the hook hour after hour.


We also practiced stippling...


placing beads in random pattern to fill in a larger area. I loved this technique.


Here's an example of Bob's stippling with sequins on his Lesage piece...


and here's a view of what stippling looks like from the back...


Learning this technique reminded me of when I first learned to knit. I had to manipulate new tools (the knitting needles) while trying to figure out how to hold the thread, how to wrap the thread, and then how to move the stitch from one needle to another without dropping a stitch, splitting the yarn or messing up. I remember being very slow and making tons of mistakes. That's what learning to use a tambour hook was like for me. Very very slow going...with only a few rows to show for hours and hours of labor.

By the third day, I was getting more adept and I could see how one could get lots faster after managing to master the hook. A classmate who had taken a class from Bob previously recommended practicing every day...and I intend to do just that.

If you are interested in learning this technique, my advice would be to manage your expectations. Don't expect to sit down and pick it up right away. A little struggle and difficulty is probably the norm.

All in all, I thoroughly enjoyed my time and having such great classmates made it even more so.


We had quite an accomplished group of beaders, quilters, conservationists, patent/trademark/copyright experts, designers and embroiderers in our class which enriched the time we were together.

Next time I'll show you close-ups of an antique Balmain gown from the '50s that Bob shared with us...

To die for!

Monday, June 14, 2010

Setting the Stage: Tambour Beading Masterclass

There were so many wonderful things about my Tambour Beading Masterclass that took place in Bob Haven's Costume department at the University of Kentucky that I've decided to break it up into multiple posts.


First of all, the course was held in Bob's "classroom" which is really just one large sewing room full of all kinds of fabrics, threads and inspiration.


Bob is a fascinating guy. He started his career as an 8th grade English teacher and became involved in school theater. He decided to get his MA in Community Theater which led him to create the Kids in Drama (K.I.D.) program in his home state of New Hampshire. He increasingly became interested in costume design and started to choose shows in order to make the costumes.


Looking to further his education, he left his full-time job as a school teacher and entered the Master of Fine Arts program at the University of Delaware to learn the art of costume design and shop management.


He has worked for three universities and is currently a tenured faculty member at the University of Kentucky. His love for costume has led him to pursue various embroidery arts and he has received his Certificate in Haute Couture embroidery from Lesage in Paris; and four certificated courses from the Royal School of Needlework. He is also pursuing the study of Japanese embroidery. And all from the love of the theater and costume...to learn more about Bob and see all of his work, you can go here.


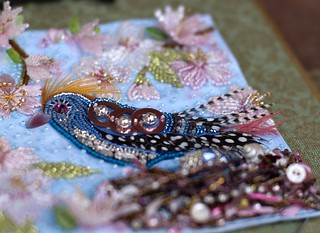
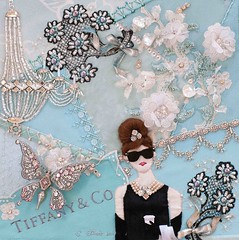
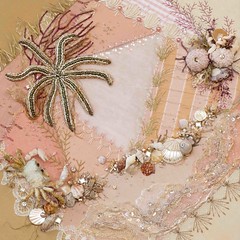
Since receiving his certificate from Lesage, he has been a prolific tambour artist, creating many many pieces of embroidery like those below using the tambour hook.


One of the advantages of embroidering with a tambour hook is speed. Of course, you have to become proficient in its use...and I have a long way to go before that happens!

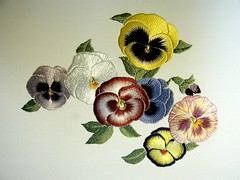
Below on the left you can see a pansy embroidered with needle and thread that took Bob about 7.5 days to complete; on the right is a pansy done embroidered with a tambour hook that took about 10 hours!


Here is Bob's finished sample of our class project:


After three days of work, I barely scratched the surface. But that's a story for tomorrow...

I'm looking forward to catching up with you all!

Tuesday, March 30, 2010

Tambour Beading Masterclass

One of my absolute favorite blog posts of all time on my own blog was this one...and it's because it speaks to my lifetime hope and dream of traveling to Paris to study at the L'Ecole Lesage to learn haute couture embroidery techniques.


Many of these techniques involve a certain type of embroidery using a tambour hook...often referred to as Broderie de Luneville and worked with the back of the embroidery facing up and the beads/sequins being threaded from underneath.

So, while I wait to gather the time and resources for my dream trip, I have been on the hunt to find a tambour work teacher here in the States, contacting Lacis and following down many leads to no avail. That's until my beading friend, Dot aka SpeedieBeadie, wrote on a list that she was attending a Tambour Beading Masterclass in June. What? Who? Where?

Work in progress -- Bob Haven
Dot led me to Robert Haven who is a costume technologist, Associate Professor of Costume Technology at the University of Kentucky. Last year, Mr. Haven went on sabbatical to complete the Professional course in Haute Couture embroidery at Lesage. Here is his completed work using all of the techniques used by the atelier to embellish the garments for the runway.


With 150 hours of class time and 300+ hours of personal stitching time.


After Paris, Mr. Haven took three concentrated certificate courses at the Royal School of Needlework. This is his finished goldwork piece...which I absolutely adore...it's not tambour beading but I can't help getting off topic...I love it...


And, if that isn't enough...Mr. Haven has also studied Japanese embroidery and his University will be hosting the 2011 Japanese Embroidery World Exhibition...He will also be the first site to incorporate a Japanese Embroidery class into an academic curriculum with a class to begin in May 2011. Phew! I cannot wait to meet this man!

And, luckily, he wrote last week that someone had unexpectedly canceled from his Beading Masterclass this June and would I be interested??? And how! I jumped, made my reservations and I am on my way...I'll be leaving on Tuesday, June 8, 2010 to attend his class. I'm hyperventilating just writing about it...And yes, I'll tell you all about it!

Work in Progress by Bob Haven

The classes for this year are full but Mr. Haven is keeping a list for next Summer's courses. Last he wrote, there were already 12 people signed up for 2011...And there may be an opportunity for a Fall class in New Orleans.

Check out his website which is rich in information and images to whet your appetite. And his tambour beading video on YouTube is a "must see"...

Is it June yet?

[Note: All pics of beadwork/embroidery above are by Bob Haven (except for the first three) and were used with his permission.]

Related Posts with Thumbnails