
We had a nice long holiday weekend and I did find some time to work on my January block. I really am trying to get this finished up soon but some things can't be rushed.
Like tissue transfer...
Though there are many methods of transferring embroidery patterns to fabric, tissue transfer is the method I use most.
It allows me more precision in the transfer and position of the design and is the most versatile of all methods. The downside is it does take a bit more time.
I first learned the discipline of tissue transfer in Japanese embroidery. Having only embroidered on pre-stamped fabrics previously, I didn't have much experience in transferring my own designs and I remember feeling the process was fairly onerous when I first learned it.
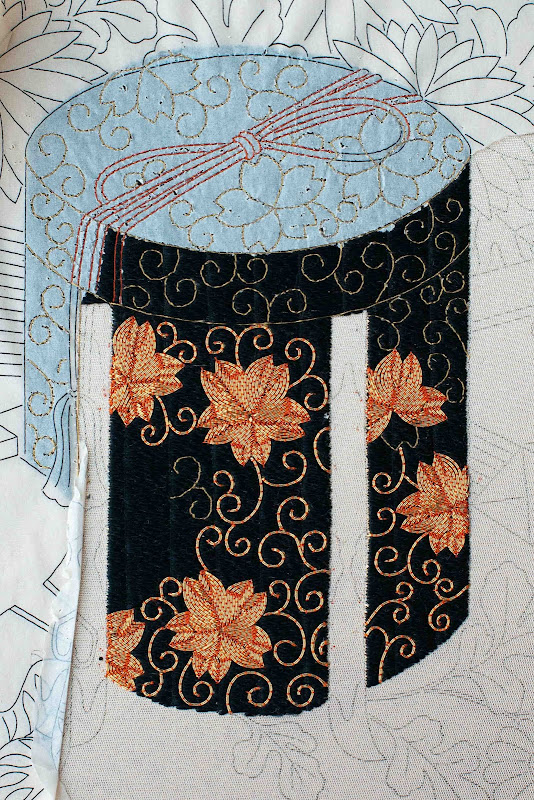
In this picture you can see how tissue was used to transfer a pattern on top of a base layer of satin stitching. The transfer line then serves as a guideline to couch the goldwork on top and the result is stunning.
Today, what I once thought was a bit onerous is now just another tool in my toolbox and part of my workflow.
As usual, it's good to start with the right tools...
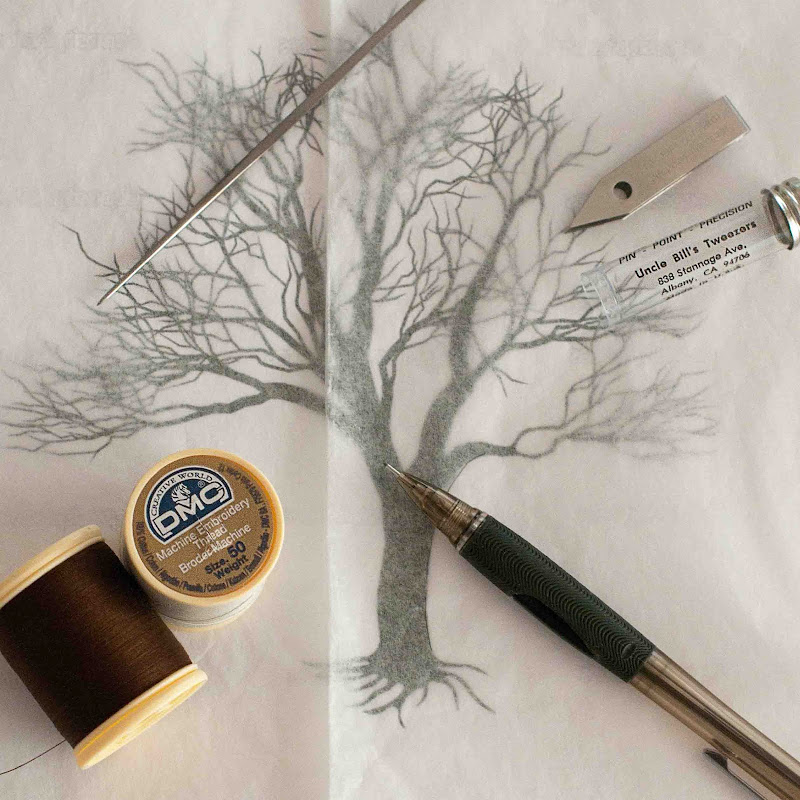
You can use any tissue really but you'll find some tear away more easily than others. In my experience, the cheaper tissues are better for this.
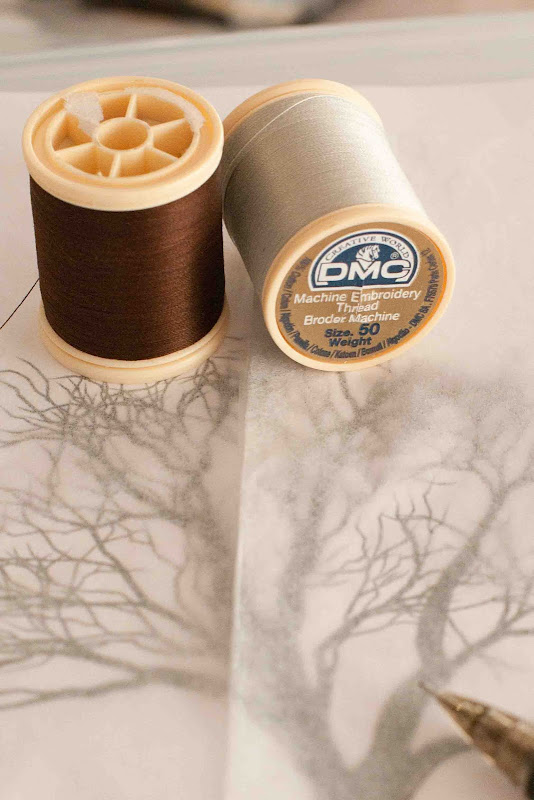
I also use a small sharps needle and a very small thread. Sewing thread will work but it's still thicker than I like. I use DMC's machine embroidery thread but any size 50 thread weight will do...
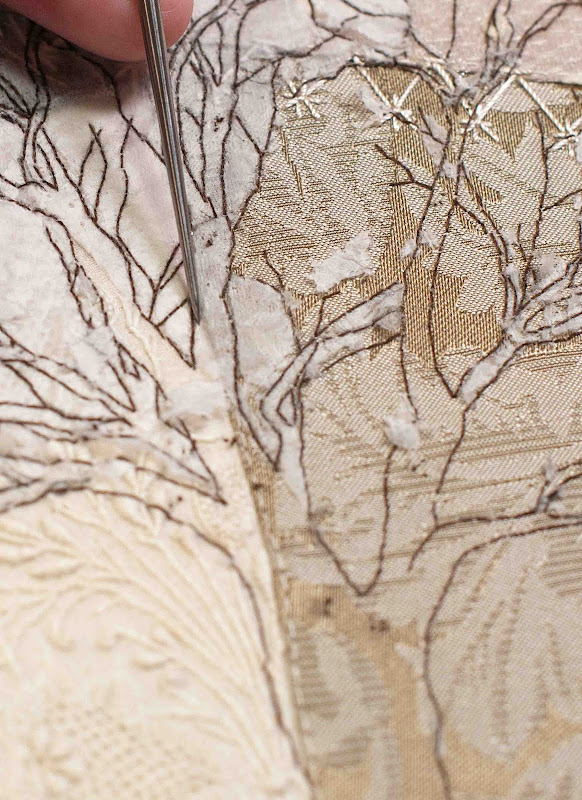
After transferring the design with 0.7mm mechanical pencil, I then backstitch around the entire pattern taking fairly small stitches of about 1/8". (If I'm doing curves, I'll use a line of held thread instead of back stitch but that's a discussion for another day...)
The size of your needle really is important. The smaller the needle, the less you'll tear the tissue and distort your penciled design.
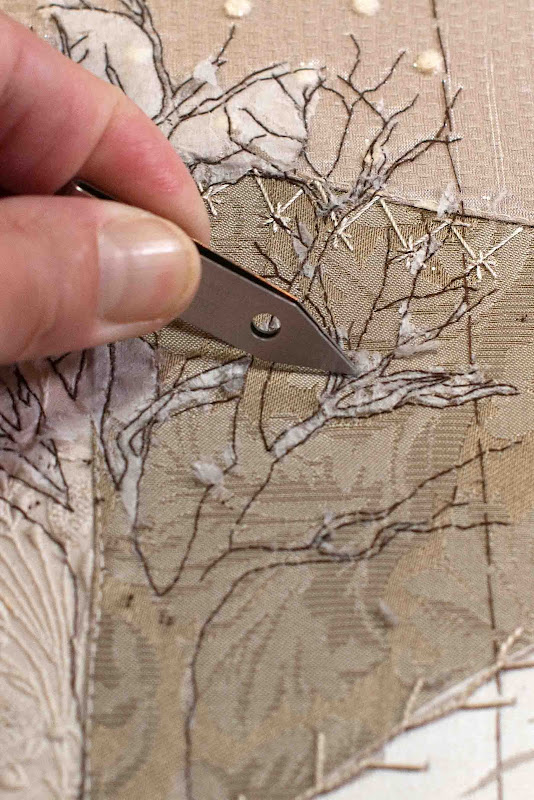
After stitching is complete, I use my favorite laying tool, my handmade Japanese tekobari. Again, that's a subject for another day just suffice it to say that it is a multi-purpose player in the toolbox and I use it to score the tissue on each side of the backstitches all the way around the design. Minus a tekobari *wink*, you can use a large sharp chenille needle, awl or anything with a good point...
This makes the lifting away of the tissue MUCH easier. Score first, then tear.
Undoubtedly, there will many tiny bits of tissue stuck between stitches...particularly when you have tiny branches etc.
That's when Uncle Bill's Precision Gripper Tweezers come in handy to make quick work of picking out all the fluff. You can use any tweezers but these little guys are my fave for this task...
A magnifier and good light doesn't hurt here either.
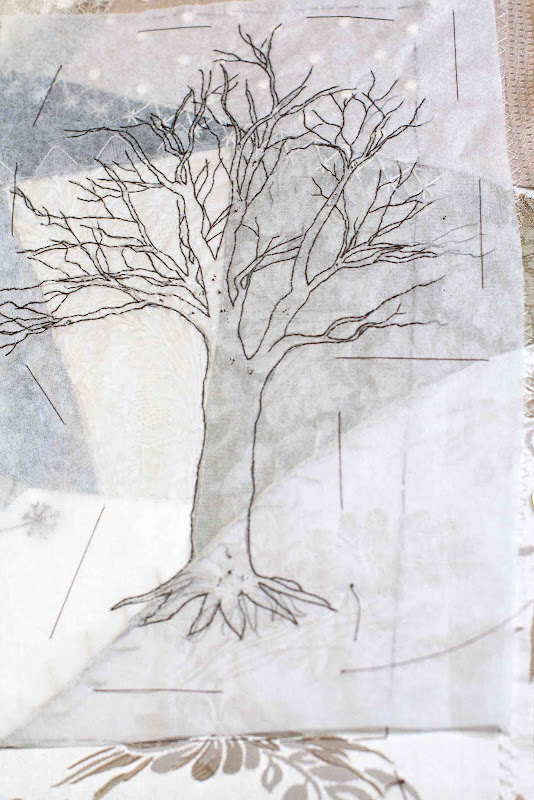
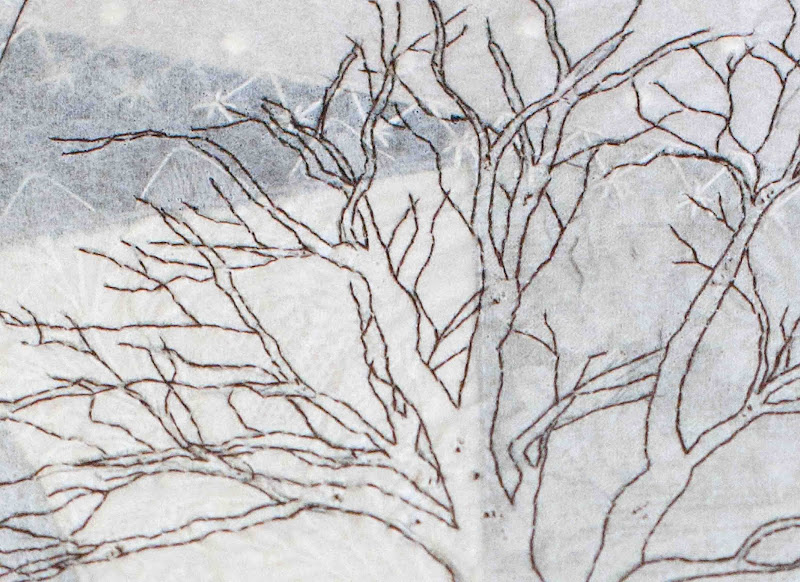
When finished, the design is transferred and ready to stitch.
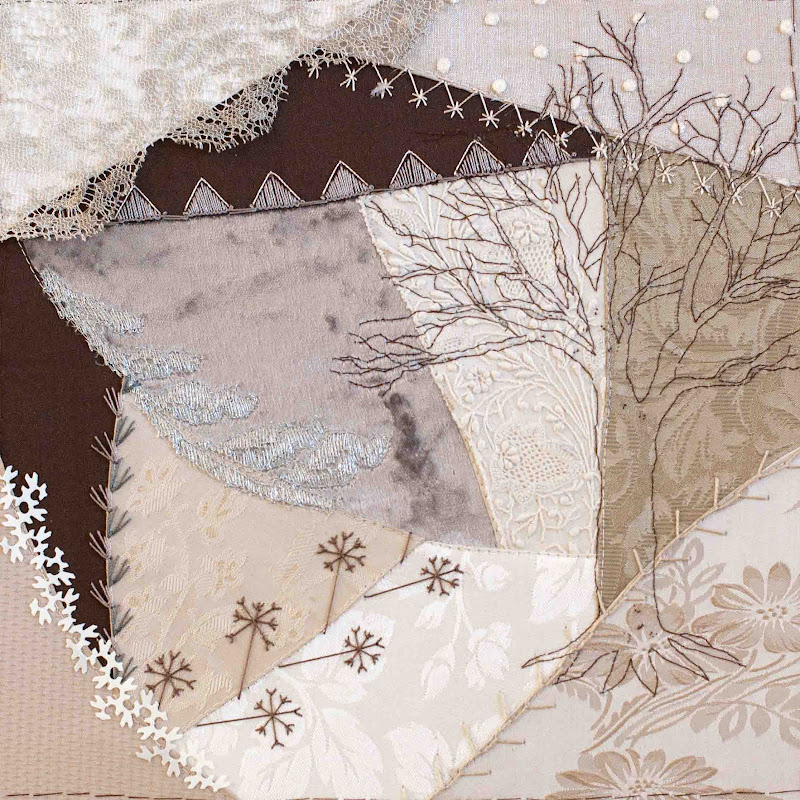
It's a terrific method for use in crazy quilting where layering motifs over fabrics and seam treatments is commonplace.
In my block, you can see that I've placed a part of the tree over a pre-embroidered needle lace cuff, seam treatments, and different fabric types...even velvet...
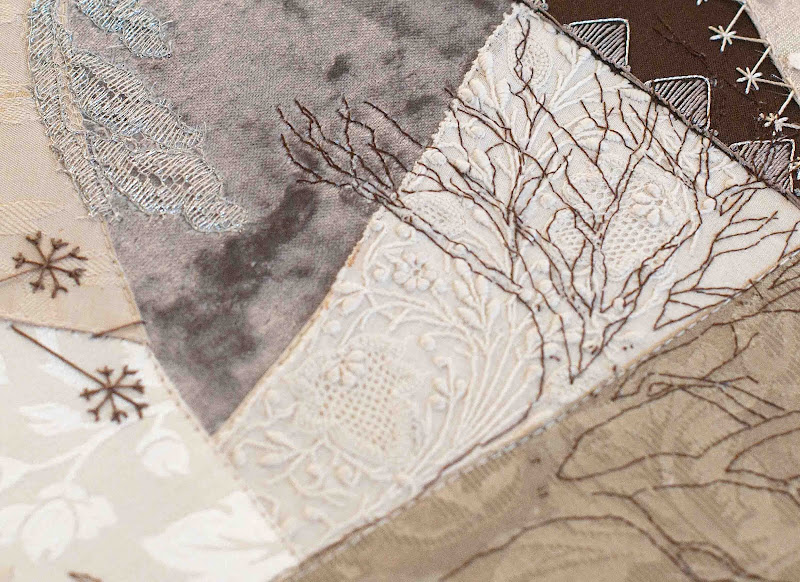
The only way to get the transfer over top of all that texture in an accurate manner, is tissue transfer so I hope you'll try it.
I'm off to finish up preparations for my Hari-kuyo Needlebook E-course which begins tomorrow!
There's still plenty of time to join in the fun and make your own book of needles. Though the full kits are sold out, I do have some felt pages and needle labels remaining but they are going fast...
Have a great day everyone. See you next time!


31 comments:
Once again you amaze me. You have such patience. It shows in your beautiful work.
Teresa's Heartfelt Stitches
What a brilliant idea..you are awesome my dear! Keep sharing :)
Thanks for the tips...and I love the tree!!! –Cassandra
That's a great technique and it's going to be another spectacular block!
Oh that needle lace cuff!!! Thank you for sharing this how to. When I saw the first photo I was thinking you would show us how to trace it on to the fabric. This was so much better!!
Deb
Thank you for this lesson. I now know how to do this! It will make me more adventurous.
THANK YOU SUSAN! I've been struggling for some time how to transfer patterns on crazy quilt blocks so thanks to you, now I know. Will be giving this a try soon.
Thanks, Susan, for sharing this technique. Do you have an online source for those tweezers? They look like they'd be perfect for lots of things! Your e-course sounds very interesting. Wish I'd known about it sooner!
I did not know tis method.
What a patience you have. i reckon it is certainly the bet way to transfer. For most of us, transferring this way would be as time-consuming as the embroidery itself, so I like the way you present it " just ready" :-)
That sure is an amazing process Susan! How long do you estimate that took? I know it will look amazing when you are finished, but I have to say, there is something intriguing to me about just the outline as well!
Thank you so much for showing us this technique. Your block is really dveloping into something marvelous:)
Hi Susan
You make it look pretty darned easy. I think I'll give this method a try really soon.
I love that tree. Did you freehand it? Its just a great tree!
xx, Carol
Thank you for showing and telling about this process.
You are creating another awesome piece.
FlowerLady
Thanks for sharing this, Susan. I just used a similar technique when creating the cartouche and swags on my latest project. I worked my stem and straight stitches through the tissue, eliminiating a step. Not that I recommend that for some projects but mine was small enough and simple enough that I could go straight to the embroidery.
I am so glad to know that someone else really likes this method. Like you said it is time consuming but I love the results. I did pick up a tip though about the scoring on each side! Thank you as that is always an issue for me and now it will be much easier. Your tree is awesome and I cannot wait to see the finished block appear.
What a great method. I love the tree just as it is but I'm sure you will astound us all agin with your creative way of making it even better.
An excellent tutorial, thank you!!
Can't wait to see this block when it's finished, the tree will be gorgeous.
I use a modified version of the tissue transfer method for doing my bead embroidered pieces, and it's wonderful!
I have you to thank -- I got the idea from one of your posts awhile back. You'd mentioned using tissue paper to print images off the computer, and I realized... I could just draw them!
Thanks for the heads up about the tweezers. That will make my life a whole lot easier. :)
Susan -
Your posts are always so timely. I was struggling yesterday how to transfer a complex pattern and none of my usual methods were working. This looks perfect ! Now I need to scurry along and get it done before the first needle case lesson is up.
KathrynK in Blacklick
Pattern transfer onto velvet! That's what caught my eye :-)
I noticed that you have an unusual pair of tweezers. Because you like them, or are they better suited to the task?
Dear Susan,
This is so helpful!! I've been so frustrated in trying to transfer my drawings to fabric. I learned a technique using charcoal pouncing but I find it messy and somewhat inaccurate. Thank you for being so generous with your knowledge. It makes me want to embroider again!
Gads, what a lot of work...I am sure it will be stunning when you're done. Makes me want to stitch a little.
Hello Susan,
Thank you for your beautiful inspiration, your performance, as well as sharing his technique, thanks for the good heart, greetings :)))
this tree is incredible! did you consider doing the 'transfer' by sewing machine? i did that with some crows, just stitched through the printer paper and tore it away. i know you have the piece stretched on a frame, but...can't think of 'but what?'...
I have very slowly, over the last couple of years, figured this trick out. But your extra tips are going to make this so much easier.
Thank you for sharing, Susan!
That is gorgeous, even as an outline! Looking forward to seeing how you fill in the tree.
Great tutorial - thanks for sharing it!
Yes, it's a very useful technique, although I don't always use it..
Going to have to give this great idea a test!
Thank you for explaining this. It's just the technique I needed.
I very much enjoy reading your blog. your work is amazing. I have to give your ideas a test.
Post a Comment