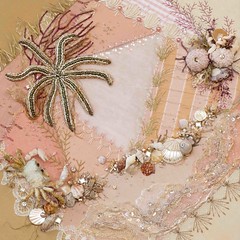
Well, as of today, one of my secrets surrounding the next BJP is out of the closet since I don't think you'll have any trouble deciphering what that orange blob has become...
I like this color scheme so much better...switching out the hot oranges and pinks for this ivory and pale pink combination... I also had my stitching friends over on Saturday and they were a ton of help. Just talking through the challenges and the meaning of this piece to me led to lots of breakthroughs -- you know who you all are and I am very grateful to you...
I've been wanting to try out the beaded coils technique from Nancy Eha's Bead Creative Art Quilts book and, it turns out, that the handle of my cup was a perfect application for this method.
I started out using a piece of raw cording and basted it into place --
I then couched it all around with a silk thread before I started beading. This made sure I had a uniform size all the way around and any areas that had fattened out, were fluffed back up again.
I then began beading all around, using Nancy's technique for compensating around the curves and Voila!
A handle for my cup. This technique was really very easy and very fun! Though I wanted my handle to be ivory, the rainbow colored coils in Nancy's book are really fun and exciting.
There are a number of other techniques in this book that I hope to try out on future pieces. Nancy also publishes a FREE beading e-newsletter and just published a new book titled Bead Creative Like Crazy, which I have not looked at yet...sorry.
But, Nancy is having an Embellished Tiara challenge which I have decided to enter; photo deadline is September 30, 2009. Maybe you'll join me??
Though I did manage to get a handle on my cup, I have not managed to get a handle on photographing this piece! The light cup on top of the dark background is presenting its challenges...I had a heck of a time just with today's pics...every time I get the lighting right for the background; the handle is overexposed...aaggh!
If you have any tips for photographing in this situation, I'd love to hear from you...My next idea is to make sure it's a really cloudy day???
Tuesday, June 9, 2009
I've got a Handle on It!
Labels:
April bjp in progress,
technique
Subscribe to:
Post Comments (Atom)






9 comments:
Thanks for sharing this technique! I am finding inspiration every time I stop by to visit your blog. Maybe I'll actually start something LOL!!!
As for photographing your pieces, a cloudy day is actually often preferable as the light is softer and you will avoid hot spots and glare. But generally with any type of photography, it is patience and practice that is required.
So far so wonderful Susan!
Photo-ing....did you try in the sun? and maybe more sideways?? I got the sideways trick from you, BTW.
Beautiful! That is probably one of the loveliest cup handles I've seen! :)
Hi Susan!
It's looking great! I like the pink and white choice too.
Just curious - after following one of your links and bouncing around for awhile, I ended up on somebody's page where they were talking about whether to knot between the beads, or not (no pun intended). I can't tell from your pictures whether you knot between the beads, or whether you thread 4-5 beads at a time, and then sew it down. Would you be willing to post a few step by step pictures one day when you are working on your charms?
Thanks for sharing your knowledge! It's so much appreciated.
Your tea cup looks great! And the beading is exquisite. The color swap also looks very nice although I didn't have a problem with the other colors either! Just like your photography...I think your pictures are wonderful! So..sorry, no tips from here.
FANTASTIC idea about the tea cup handle! I love the added dimensions. As for Sheila's question, I do bead embroidery a lot too, and I work in sets of 4 sewing them down in groups. You are suppose to knot frequently, but I usually don't and haven't had any problems with my pieces coming lose. dot
Thank you, Dot! It's fascinating to learn these little bits and pieces. I'm ready to jump in and try this myself. One other question, do you recommend any particular book as a favorite resource with good directions for a beginner beader?
Oh good, Sheila, I'm glad to see you read the comments because I went looking for your blog link and your email address and, alas, I cannot find either one. There are a number of good bead books. I enjoy Robin's One Bead at A Time -- I also really enjoy Country Bumpkin's A-Z of Bead Embroidery -- there are many others but these are two of my faves and have all the basics to get you started...there are others but they all have a lot of overlap where the basics are concerned so once you get started, depending on where you want to go next, I can make more recommendations.
I go through three/four beads at a time and then always back stitch through the last two to anchor them again...I go through fewer beads depending on their size -- size 8 I go through 2 then 1; size 11 I go through 3 then backstitch 2 of those; size 13/15 I will go through 4 then backstitch 2....Always, when I'm finished a line -- in order to get all the beads "in line" I run the thread all the way back through the entire line to snug it up and straighten it. The other thing that changes how many beads I put on at a time is the tightness of the curve -- the tighter the curve, the fewer the beads per stitch...let me know that you get this otherwise I have to keep tracking you down and yes, I will try to post about it sometime....
Good luck!
Thanks Susan! I got your message! Just got home from a swim meet tonight, so I'll post tomorrow.
Post a Comment