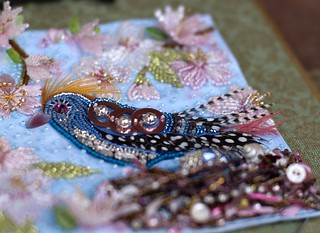
One of the skills I am learning in Phase IX of Japanese Embroidery instruction is something called superimposed work.
Superimposed work is stitching on top of a stitched ground or foundation. I've completed some superimposed work already when I laid goldwork leaves and cherry blossoms over a black twisted thread foundation.

After finishing the flat silk stitching of the box legs, I'm ready to superimpose more embroidery details on top of what I've already stitched, building the embroidery detail in layers.
First, I need to transfer the embroidery design again. Most of the time, I hand draw on tissue paper and transfer the design that way (the tree on my January Reflections piece was done this way). In order to be a bit more precise, I will sometimes print the pattern onto tissue paper using the copy setting on my printer.
First, I tape a piece of tracing paper (I like Bienfang best) onto a plain sheet of copy paper...

Next, I set the copy setting on the lowest possible ink density.

You don't want too much ink because it can flake off and get on your embroidery which wouldn't be great. In fact, if I were working with light colors I probably wouldn't use this printer method but would instead trace it by hand to avoid this potential problem.
Once the pattern is copied, I actually cut the sheet of tissue paper into pieces along the dotted lines. I didn't get a picture of this step but it's kind of important.

Because the fabric is stretched on a frame, the pattern doesn't always fit the space exactly. By cutting the tissue pattern along the dotted lines, I'm able to more accurately fit the design over the top of the box, the left leg and the right leg and baste them in place. If I tried to fit the transfer without cutting the tissue, it would be nearly impossible to line up the design accurately. I hope that makes sense.
Next, I transfer the design by using one of my couching threads in the color that either matches the foundation or matches the embroidery to be superimposed. In this case, I'll be stitching the box ties and tassels using a reddish-orange silk so I used a red couching thread to transfer my design. For the tiny metal fittings on the box legs, I used gold couching thread.
A design can be transferred using running stitch or a line of held thread. I chose line of held thread in this instance because I like that it gives me a firm edge over which to lay my flat silk for the tassel.
A line of held thread begins by stitching one long straight stitch along the design line. In the example below, I chose to stitch one side of the tassel...

Because the tassel side curves, my tension is somewhat loose on that thread so that I can couch the line in place over the design line. The first couching stitch is in the center of the line (see above).
Next, I begin shaping my long stitch along the design line by couching halfway again between the middle stitch and the ends of my thread...

I continued to couch the thread evenly by continuing to divide each space in half...
Until I've securely couched down the entire design line...
If the shape is very curvy, my couching stitches will be closer together.
After I score the tissue paper and remove it from my work with a tweezer, I'm ready to begin stitching the cord, tassels and metal fitting on the legs of the box.
Now for the disclaimer. I am by no means an expert Japanese embroiderer. I am a student. The information that I share here is my own experience and not necessarily the gospel as it relates to Japanese embroidery. There may be readers who are far more experienced than I who would like to chime in and I welcome their input. Also, my teacher may buzz in here every now and then to correct me and when she does, I will share that as well.
Thank you for coming along for the journey. I hope you will find information here that will help you with your own needlework.
Now, I'm back to work. Until next time!


11 comments:
I so admire your skill with this Japanese embroidery, personally it is not something I would ever try but really love seeing it
Thank you for posting your technique! I've pinned it for future reference :)
Thanks for sharing your technique. I use a held thread for straight lines but I hadn't thought of trying it for curves. Good idea using your red couching thread as well. Seems obvious - but I always tend to reach for my white couching thread for outlining - just habit I suppose.
Just fascinating! Student or not, it's lovely work!
So intricate! Really enjoying following along with this!
Beautiful work Susan, as always. I use line of held thread for curves, I get a much nicer line, if it's a long curve I often break it up into sections as well to make it easier.
Looking forward to the next instalment and can't wait to see Mrs Rose.
I'd never be able to do such beautiful work but it is inspiring to see and read how it can be achieved.
I love all of your embroideries and this goldwork, to me, is stunning.
So beautiful! Thank you for sharing the process with us.
I love watching this piece evolve. It is incredibly beautiful... What a journey learning as you go...
You are so gifted and thank you for always sharing and teaching us....
Hi Susan , still following you in 2019 . Your blog had been a great help for my Japanese Embroidery . I hope to still enjoy doing your sake box :)
Post a Comment